Parking Brake Actuator: Installation
- Install the parking brake actuator and cable assembly.
- Install the 2 nuts.
- Connect the electrical connector.
- RH side rear: Connect the brake line.
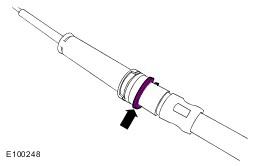
- Clean the component mating faces.
- Secure the clip.
- Tighten the brake line union to 16 Nm (12 lb.ft).
- Locate and secure the parking brake emergency release cable.
- Install the fuel tank heat shield.
- Tighten the bolts to 6 Nm (4 lb.ft).
- Tighten the nuts to 3 Nm (2 lb.ft).
- Secure the fuel tank breather line bracket.
- Install the plastic insert.
- Locate and secure the RH parking brake cable.
- Tighten the bolts to 22 Nm (16 lb.ft).
- Secure the parking brake cable to the 2 pipe clips.
- Secure the cable grommet to the integrated body frame bracket.
- Locate and secure the LH parking brake cable.
- Tighten the bolts to 22 Nm (16 lb.ft).
- Secure the wiring harness.
- Secure the cable grommet to the integrated body frame bracket.
- Connect the parking brake cables to the wheel hubs.
- Connect the cable to the brake shoe lever.
- Locate the cable to the backplate.
- Tighten the nut to 8 Nm (6 lb.ft).
- Install the LH rear brake disc.
- Tighten the Torx screw to 35 Nm (26 lb.ft).
- Secure the LH rear brake caliper.
- Remove and discard the tie strap.
- Tighten the bolts to 115 Nm (85 lb.ft).
- Install the RH rear brake disc.
- Tighten the Torx screw to 35 Nm (26 lb.ft).
- Secure the RH rear brake caliper.
- Remove and discard the tie strap.
- Tighten the bolts to 115 Nm (85 lb.ft).
- Adjust the parking brake shoes. See PARKING BRAKE SHOE AND LINING ADJUSTMENT .
- Bleed the brake system. Refer to Component Bleeding .
- Install the wheels and tires.
- Tighten the wheel nuts to 140 Nm (103 lb.ft).
- Install fuse number 8 into the BJB.
- Using the Land Rover approved diagnostic system, calibrate the parking brake actuator on an even surface.
- Apply and release hand brake to confirm operation.
NOTE:
Note the routing of the parking brake emergency release cable.
NOTE:
Remove and discard the blanking caps.
CAUTION:
Make sure the parking brake emergency release cable to body seal is installed correctly.
NOTE:
Make sure that the brake cable circlip is positioned as shown.
CAUTION:
Make sure that the component is clean, free of foreign material and lubricant.
CAUTION:
Make sure that the component is clean, free of foreign material and lubricant.