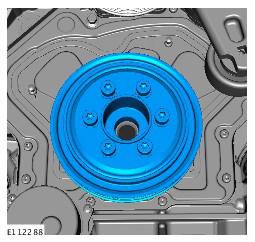
Crankshaft Pulley: Installation
- Install the special tool.
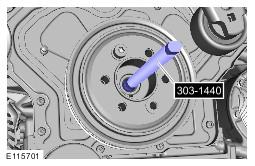
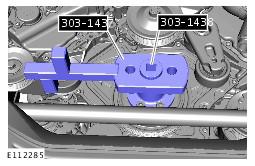
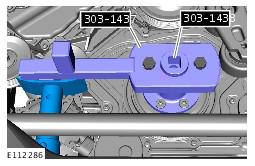
Crankshaft Damper Removal/Installation Stud (303-1440)
- Install the special tool.
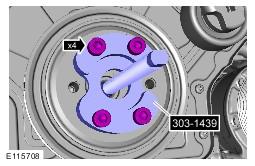
Crankshaft Damper Removal Plate (303-1439)
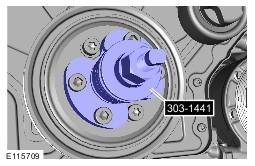
- Install the special tool.
Crankshaft Damper Remover/Installer Body (303-1441)
- Remove the special tool.
- Remove the special tool.
- Install the crankshaft pulley bolt, but do not fully tighten at this stage.
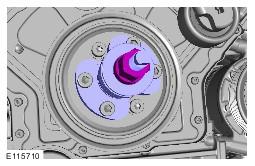
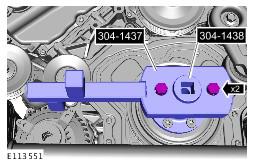
- Install the special tools.
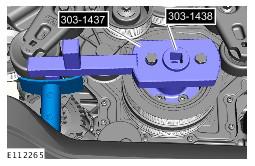
Crankshaft Damper Remover/Installer (303-1437)
Crankshaft Damper Bolt Remover/Installer (303-1438)
- Torque: 25 Nm
- Remove the special tool.
Torque: 25 Nm
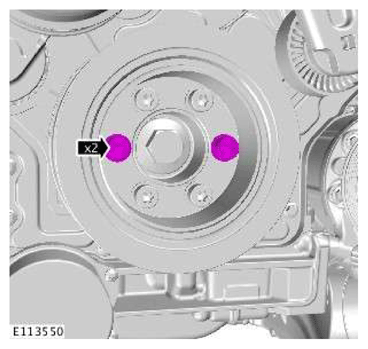
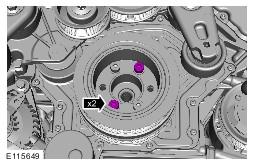
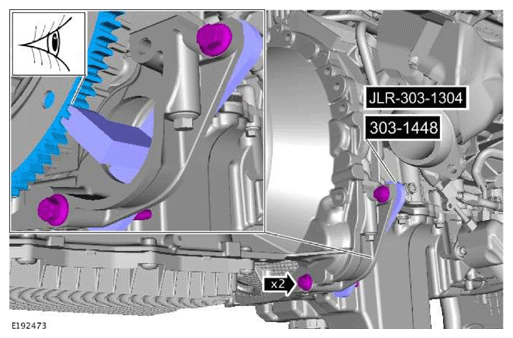
Locking Tool (303-1448)
- Using a suitable stand, support the special tool.
- Stage 1: 200 Nm
Stage 2: 270°
- Install the special tool.
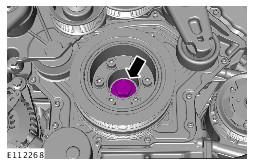
Locking Tool (303-1448)
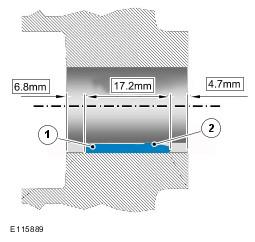
- See Figure
- Remove the special tool.
- Clean the original crankshaft pulley bolts and apply Loctite 270 to the threads before installation.
Torque: 65 NM
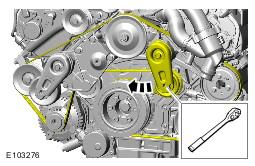
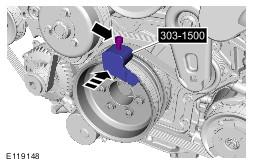
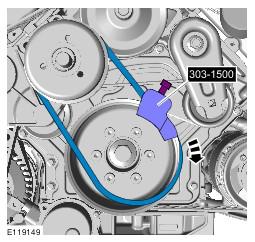
- Installer, Stretchy Belt (303-1500)
- Install the starter motor.
Refer to STARTER MOTOR .
- Install the radiator.
Refer to RADIATOR .
- Connect the battery ground cable. Refer to SPECIFICATIONS .
NOTE:
Make sure to clean the threads in the end of the crankshaft and that the crank nose is free of any foreign materials.
NOTE:
Skip to step 11 for engines fitted with early RH thread crankshaft bolt.
CAUTION:
Rotate the crankshaft pulley installation tool anti-clockwise until the pulley is fully located, do not over tighten. Failure to do this may result in damage to the components.
NOTE:
The original M10 bolts can be reused.
WARNING:
Make sure that a new bolt is installed.
CAUTION:
Tighten the component finger tight first
NOTE:
The graphic shows the tool position for LH thread only, RH thread will be the opposite.
NOTE:
The use of a torque multiplier capable of 600 Nm will be required

NOTE:
The original M10 bolts can be reused.