Timing Drive Components: Removal
CAUTION:
Check all timing components for wear and install new components if required.
NOTE:
Removal steps in this procedure may contain installation details.
NOTE:
Some variation in the illustrations may occur, but the essential information is always correct.
- Disconnect the battery ground cable. Refer to SPECIFICATIONS information.
- Raise and support the vehicle.
- Refer to: TIMING COVER .
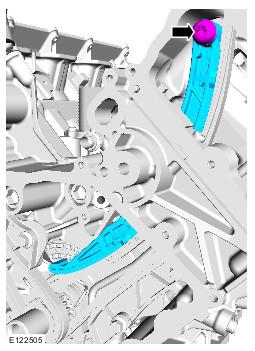
- See Figure
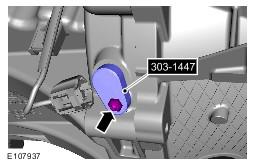
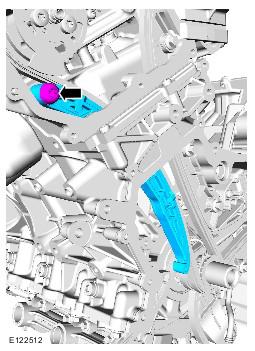
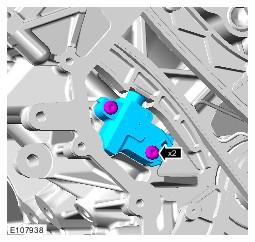
- Install the special tool.
Timing Tool (303-1447)
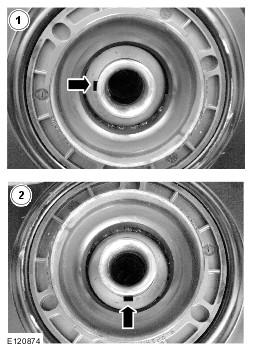
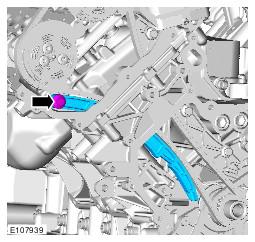
- Note the position of the crankshaft woodruff key.
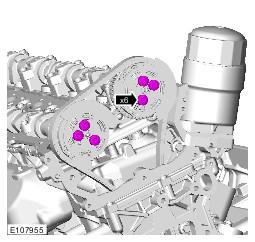
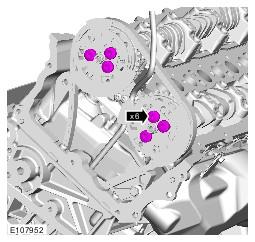
- See Figure
- See Figure
- See Figure
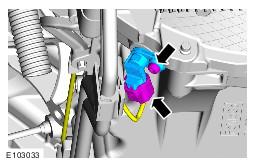
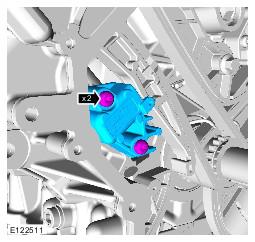
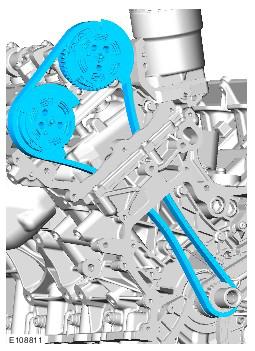
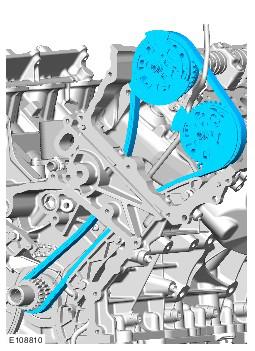
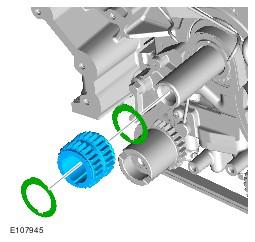
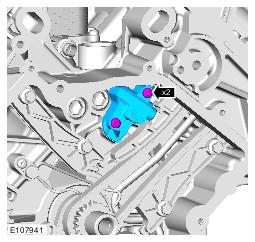
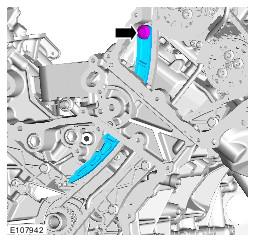
- Remove the timing chain with the VVT units.
- See Figure
- See Figure
- See Figure
- Remove the timing chain with the VVT units.
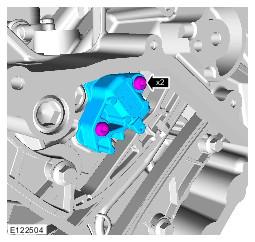
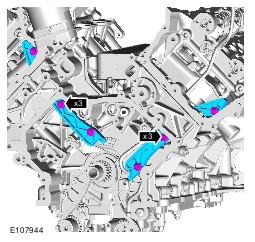
- See Figure
- See figure
WARNING:
Make sure to support the vehicle with axle stands.
CAUTION:
Only rotate the crankshaft clockwise.
CAUTION:
If the noted position of the woodruff key is at the 9 o'clock position, then a new flexplate must be installed. If the woodruff key is in the 6 o'clock position then proceed with the next step.
CAUTION:
If the variable valve timing (VVT) units are knocked or dropped then the VVT must be replaced.
CAUTION:
If the VVT is knocked or dropped then the VVT must be replaced.
CAUTION:
Discard the friction washer.
CAUTION:
Check all timing components for wear and install new components if required.
NOTE:
Some variation in the illustrations may occur, but the essential information is always correct.
- Disconnect the battery ground cable. Refer to SPECIFICATIONS information.
- Raise and support the vehicle.
- See Figure
- Install the special tool.
- Note the position of the crankshaft woodruff key.
- Refer to: TIMING COVER .
- See Figure
- See Figure
- See Figure
- Remove the timing chain with the VVT units.
- See Figure
- See Figure
- See Figure
- Remove the timing chain with the VVT units.
- See Figure
- See figure
WARNING:
Make sure to support the vehicle with axle stands.
CAUTION:
Only rotate the crankshaft clockwise.
CAUTION:
If the noted position of the woodruff key is at the 9 o'clock position, then a new flexplate must be installed. If the woodruff key is in the 6 o'clock position then proceed with the next step.
CAUTION:
If the variable valve timing (VVT) units are knocked or dropped then the VVT must be replaced.
CAUTION:
If the VVT is knocked or dropped then the VVT must be replaced.
CAUTION:
Discard the friction washers.