Right-Hand Fuel Rail High-Pressure Fuel Pump: Removal
CAUTION:
Always carry out the cleaning process before carrying out any repairs to the fuel injection system components. Failure to follow this instruction may result in foreign matter ingress to the fuel injection system.
CAUTION:
Make sure that tools and equipment are clean, free of foreign material and lubricant.
NOTE:
Removal steps in this procedure may contain installation details.
NOTE:
Some variation in the illustrations may occur, but the essential information is always correct.
- Refer to Petrol and Petrol-Ethanol Fuel Systems Health and Safety Precautions information.
- Refer to Fuel System Pressure Release - 5.0L information.
- Disconnect the battery ground cable. Refer to Specifications information.
- Refer to Engine Oil Draining and Filling information.
- See figure
- See figure
- Refer to Air Cleaner Outlet Pipe T-Connector information.
- See Fuel Injection Component Cleaning . .
- See figure
- See figure
- See figure
- Raise and support the vehicle.
- Refer to Steering Gear - 5.0L information.
- Refer to Engine Mount RH information.
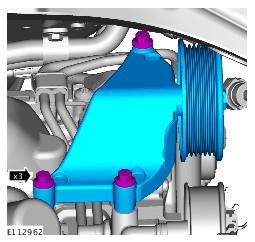
- Refer to Generator information.
- See figure
- See figure
- See figure
- See figure
- See figure
- See figure
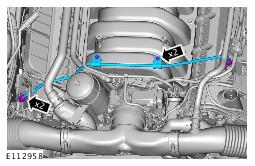
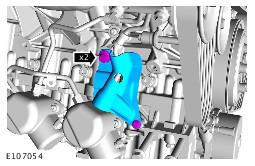
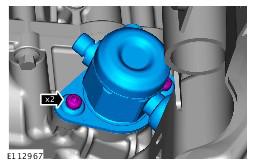
- Loosen the Torx screws a turn each at a time.
- See figure
CAUTION:
Be prepared to collect escaping fluids.
CAUTION:
Be prepared to collect escaping fluids.
CAUTION:
Make sure that all openings are sealed. Use new blanking caps.
CAUTION:
Be prepared to collect escaping fluids.
CAUTION:
Make sure that all openings are sealed. Use new blanking caps.
WARNING:
Do not work on or under a vehicle supported only by a jack. Always support the vehicle on safety stands.
NOTE:
Engine shown removed for clarity.
NOTE:
Engine shown removed for clarity.
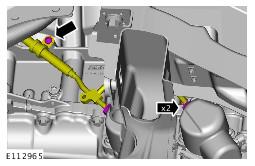
CAUTION:
Be prepared to collect escaping fluids.
CAUTION:
Make sure that all openings are sealed. Use new blanking caps.
CAUTION:
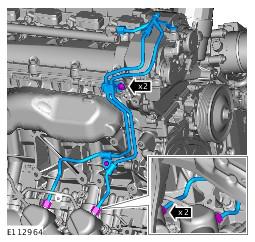
Remove and discard the high-pressure fuel supply lines.
NOTE:
Engine shown removed for clarity.
CAUTION:
Be prepared to collect escaping fluids.
CAUTION:
Make sure that all openings are sealed. Use new blanking caps.
CAUTION:
Be prepared to collect escaping fluids.
CAUTION:
Be prepared to collect escaping fluids.