Right-Hand Fuel Rail High-Pressure Fuel Pump: Installation
- See figure
- Torque: 11
- Loosen the Torx screws half a turn each.
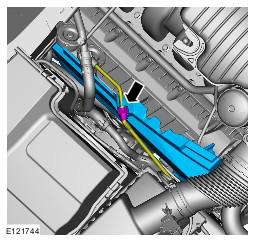
- See figure
- See figure
- Torque: 11
- Lower the vehicle.
- See figure
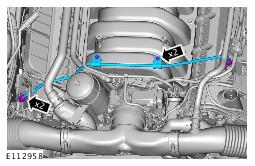
- Raise and support the vehicle.
- Torque:
- Torque: 21
- Torque:
- Torque: 21
- Torque:
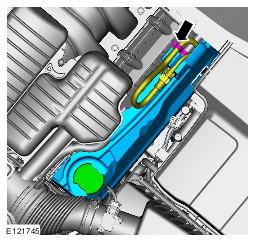
- See figure
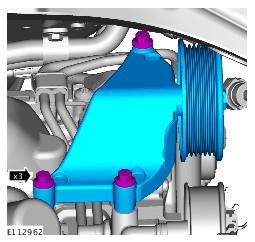
- Torque: 25
- Refer to Generator information.
- Refer to Engine Mount RH information.
- Refer to Steering Gear - 5.0L information.
- Lower the vehicle.
- See figure
- See figure
- Torque:
- Torque: 21
- Refer to Air Cleaner Outlet Pipe T-Connector information.
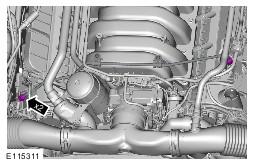
- See figure
- See figure
- Refer to Engine Oil Draining and Filling information.
- Connect the battery ground cable. Refer to Specifications information.
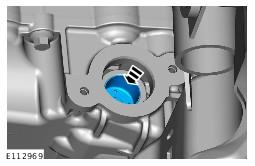
NOTE:
Lubricate the fuel rail high-pressure fuel pump bucket with clean engine oil.
CAUTION:
Tighten the Torx screws a turn at a time until the correct torque is achieved.
NOTE:
Lubricate the fuel rail high-pressure fuel pump O-ring seal with clean engine oil.
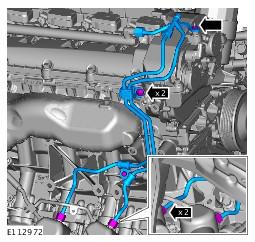
CAUTION:
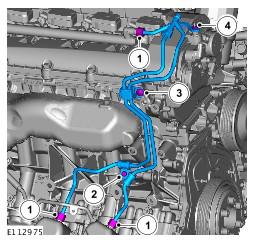
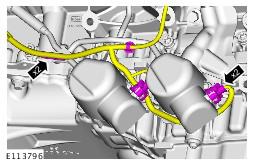
Install new high-pressure fuel supply lines.
CAUTION:
Lubricate only the union threads with clean engine oil.
NOTE:
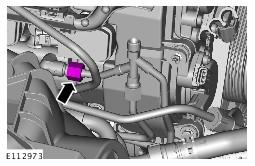
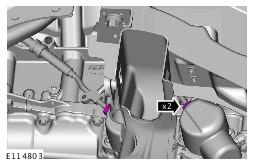
Remove and discard the blanking caps.
NOTE:
Engine shown removed for clarity.
NOTE:
Install the bolt and unions fully finger tight before final tightening.
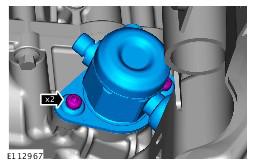
CAUTION:
Care must be taken when positioning the fuel rail high-pressure fuel pump cover to one side.
NOTE:
Fuel rail high-pressure fuel pump cover shown removed for clarity.
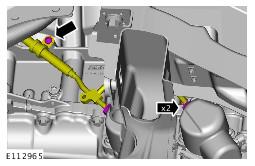
NOTE:
Do not tighten at this stage.
NOTE:
Remove and discard the blanking caps.
WARNING:
Do not work on or under a vehicle supported only by a jack. Always support the vehicle on safety stands.
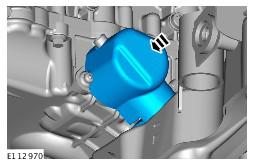
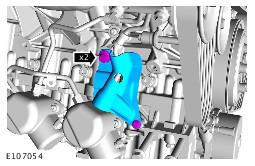
NOTE:
Engine shown removed for clarity.
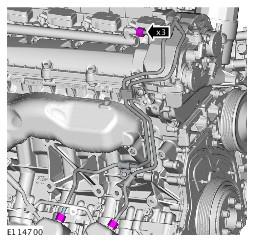
NOTE:
Engine shown removed for clarity.
NOTE:
Install the bolt and unions finger tight before final tightening.
NOTE:
Remove and discard the blanking caps.
NOTE:
Engine shown removed for clarity.
NOTE:
Engine shown removed for clarity.
NOTE:
Lubricate the union threads with clean engine oil.
NOTE:
Do not tighten at this stage.
NOTE:
Remove and discard the blanking caps.