Body - (Petrol): Installation
- Using an assistant install the body to the integrated body frame.
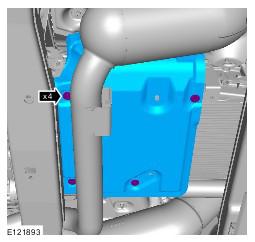
- Install the body mounts.
- With assistance align the body and integrated body frame mounts.
- Install the bolts, but do not tighten fully at this stage.
- Remove the tie down straps securing the body.
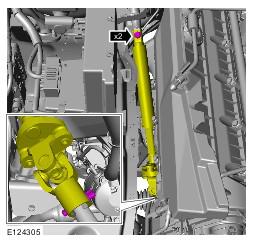
- TORQUE: 133 Nm
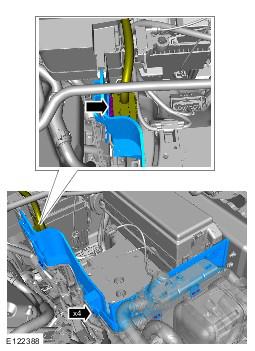
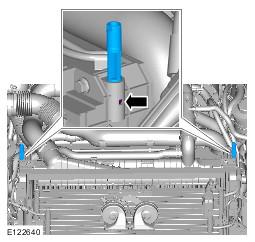
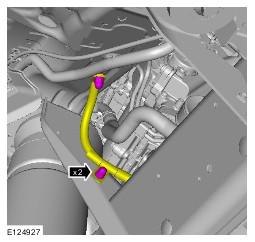
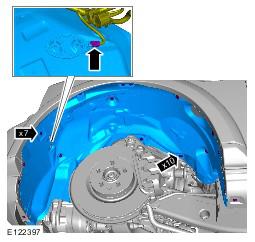
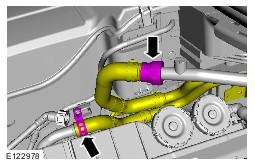
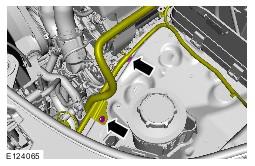
- See figure.
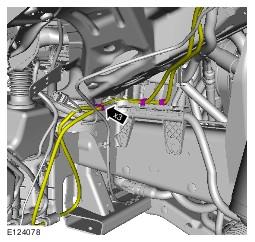
- TORQUE: 25 Nm
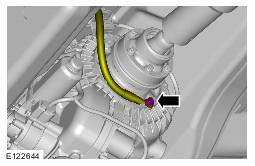
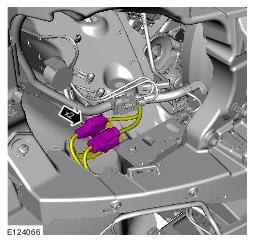
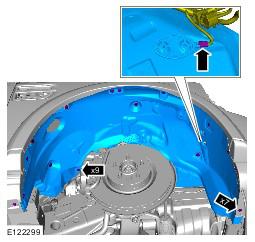
- See figure.
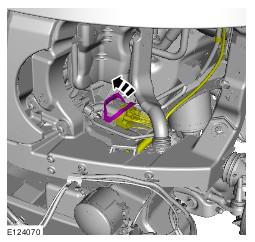
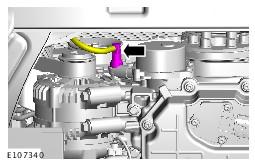
- See figure.
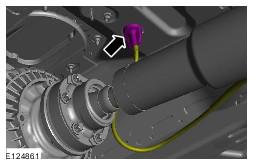
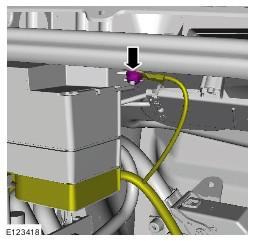
- TORQUE: 12 Nm
- TORQUE: 12 Nm
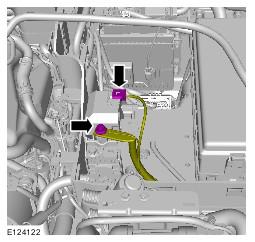
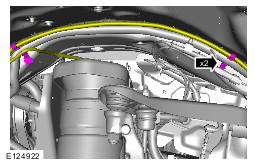
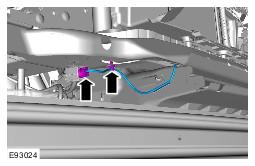
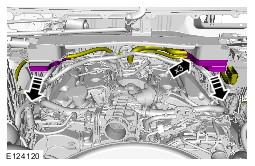
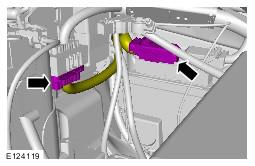
- See figure.
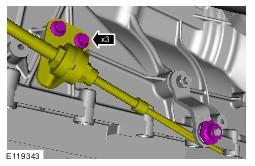
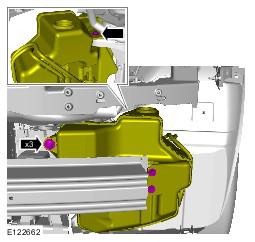
- See figure.
- TORQUE: 12 Nm
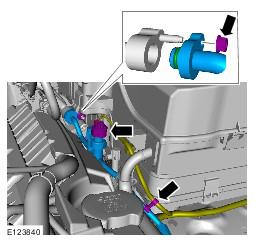
- Refer to Fuel Filler Door Assembly information.
- TORQUE: 16 Nm
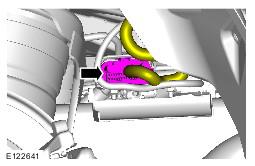
- Clean the component mating faces.
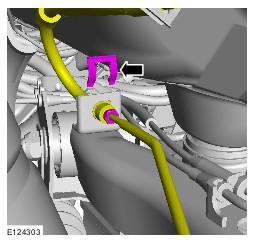
- Secure the clip.
- TORQUE: 16 Nm
- Clean the component mating faces.
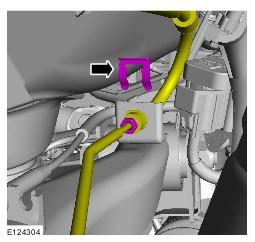
- Secure the clip.
- TORQUE: 16 Nm
- Clean the component mating faces.
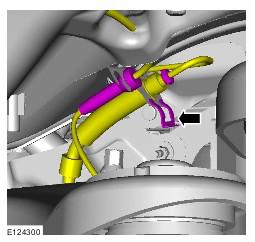
- Secure the clip.
- TORQUE: 16 Nm
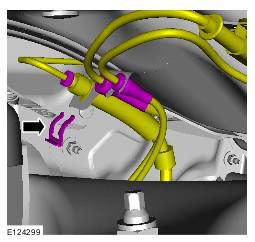
- Clean the component mating faces.
- Secure the clip.
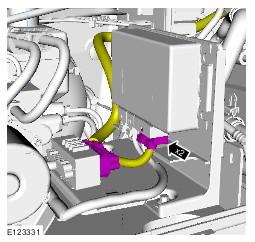
- TORQUE: 25 Nm
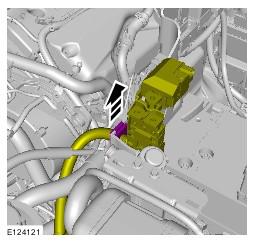
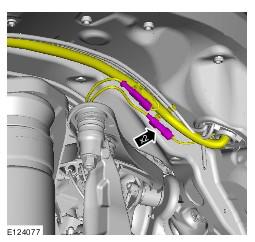
- See figure.
- See figure.
- See figure.
- TORQUE: 12 Nm
- See figure.
- TORQUE: 20 Nm
- See figure.
- See figure.
- See figure.
- TORQUE: 20 Nm
- See figure.
- See figure.
- See figure.
- TORQUE: 12 Nm
- Install new O-ring seals.
- TORQUE: 12 Nm
- Install new O-ring seals.
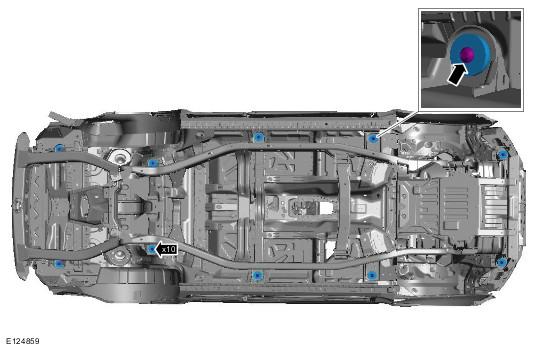
- See figure.
- See figure.
- See figure.
- See figure.
- TORQUE: 8 Nm
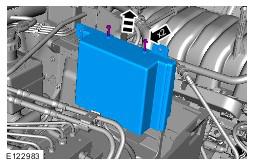
- Refer to Auxiliary Battery Tray information.
- TORQUE: 10 Nm
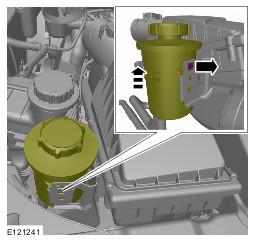
- Refer to Coolant Expansion Tank
information.
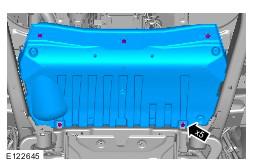
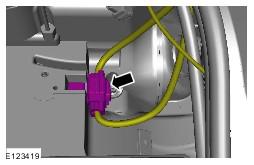
- See figure.
- TORQUE: 10 Nm
- Refer to Rear Bumper Cover information.
- Refer to Air Cleaner LH information.
- Refer to Air Cleaner RH information.
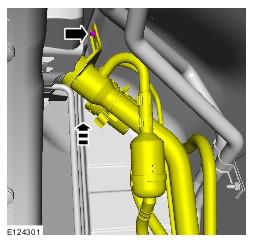
- See figure.
- TORQUE: 10 Nm
- See figure.
- See figure.
- See figure.
- See figure.
- See figure.
- Refer to Air Conditioning (A/C) System Recovery, Evacuation and Charging information.
- Refer to Battery information.
- Bleed the braking system. Refer to Brake System Bleeding information.
- Check and top-up the coolant.
All vehicles
CAUTION:
Make sure that new bolts are installed.
CAUTION:
Make sure that all components are free and do not get caught up whilst lowering the body onto the integrated body frame.

NOTE:
Remove and discard the blanking caps.
NOTE:
Remove and discard the blanking caps.
NOTE:
Remove and discard the blanking caps.
NOTE:
Remove and discard the blanking caps.
WARNING:
Make sure that a new bolt is installed.


CAUTION:
Make sure that all openings are sealed. Use new blanking caps.
CAUTION:
Make sure that all openings are sealed. Use new blanking caps.

WARNING:
Be prepared to collect escaping fluid.
Vehicles with active damping
All vehicles
All vehicles

NOTE:
RHD illustration shown, LHD is similar.