Evaporator Core: Removal
- Remove the engine cover. Refer to Engine Cover - 5.0L .
- Evacuate the A/C system. Refer to Air Conditioning (A/C) System Recovery, Evacuation and Charging .
- Raise and support the vehicle.
- Drain the cooling system. Cooling System Draining, Filling and Bleeding. Refer to Cooling System Draining, Filling And Bleeding .
- Remove the driver side front seat. Refer to Front Seat .
- Remove the floor console. Refer to Floor Console .
- Remove the instrument panel upper section. Refer to Instrument Panel Upper Section .
- Release the 3 ground cables from the driver side lower A-pillar.
- Remove the 2 nuts.
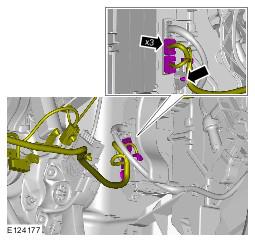
- Disconnect the 5 electrical connectors from the driver side lower A-pillar.
- Disconnect the 3 electrical connectors.
- Release the 3 ground cables from the passenger side lower A-pillar.
- Remove the 2 nuts.
- Disconnect the 5 electrical connectors from the passenger side lower A-pillar.
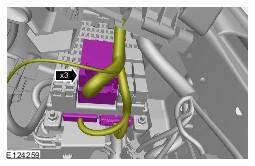
- Disconnect the central junction box (CJB) three electrical connectors.
- Disconnect 2 electrical connectors from the instrument panel center reinforcement.
- If installed, disconnect the instrument panel center reinforcement fibre optic cables.
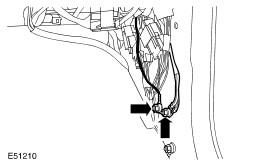
- Disconnect the electrical connector.
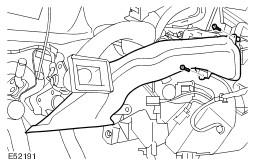
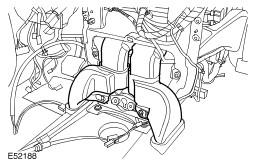
- Remove the heater housing center ducts.
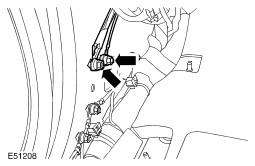
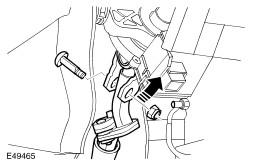
- Disconnect the steering column intermediate shaft from the steering column.
- Note the fitted position.
- Remove the special bolt and discard the nut.
- Release the heater housing from the instrument panel carrier.
- Remove the 7 Torx screws.
- Remove the plenum chamber panel. Refer to Plenum Chamber .
- Remove the instrument panel carrier to bulkhead Torx bolt.
- With assistance, remove the instrument panel.
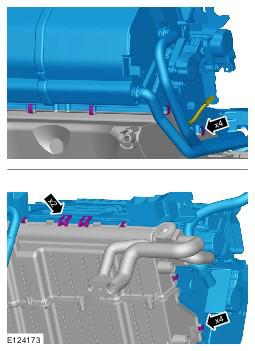
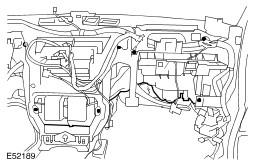
- Remove the 6 Torx bolts.
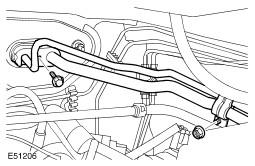
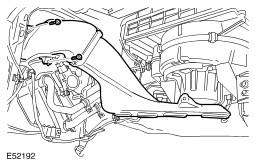
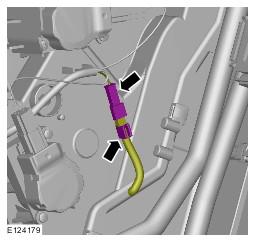
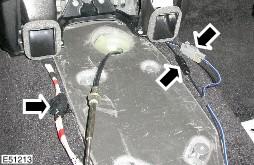
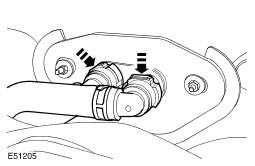
- Disconnect 2 heater hoses from the bulkhead.
- Release the 2 clips.
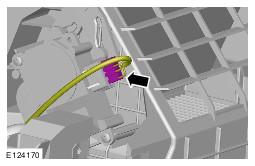
- Release the 2 A/C refrigerant lines.
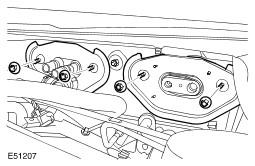
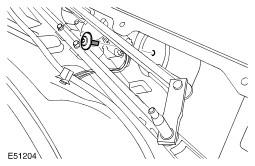
- Remove the nut and bolt.
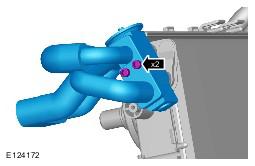
- Remove and discard the O-ring seals.
- Remove the 2 adapter panels.
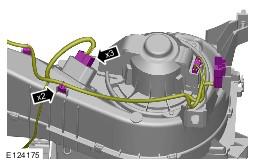
- Remove the 4 nuts.
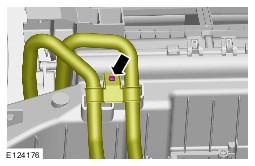
- Disconnect 2 drain tubes from the heater housing.
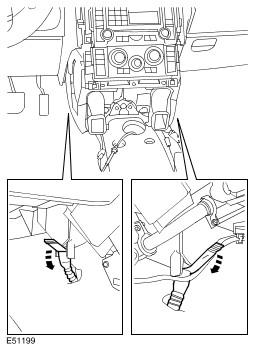
- Remove the driver side footwell duct.
- Remove the 2 Torx screws.
- Remove the passenger side footwell duct.
- Remove the 2 Torx screws.
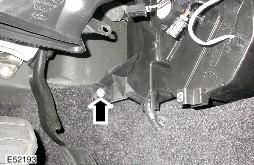
- Driver side: Remove the heater housing to bulkhead Torx bolt.
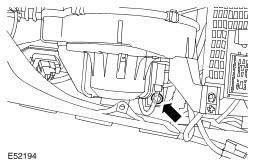
- Passenger side: Remove the heater housing to bulkhead Torx bolt.
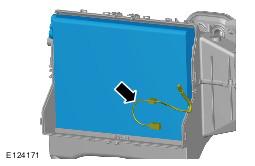
- With assistance, remove the heater and evaporator core housing.
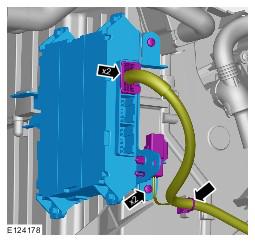
- Remove the A/C control module.
- Disconnect the evaporator core temperature sensor electrical connector.
- Disconnect the electrical connector.
- Detach the wiring harness.
- Remove the bolt from the support bracket.
- Remove the heater and evaporator core housing.
- Remove the 8 clips.
- Carefully release the 2 clips.
- Remove the thermostatic expansion valve.
- Remove the evaporator core.
- Release the temperature sensor.
WARNING:
Do not work on or under a vehicle supported only by a jack. Always support the vehicle on safety stands.

CAUTION:
Cover fiber optic cable connectors to minimize dust ingress and avoid bending the cables in a radius of less than 30 mm.
CAUTION:
Before disconnecting or removing the components, make sure the area around the joint faces and connections are clean. Plug open connections to prevent contamination.
CAUTION:
Immediately cap all refrigerant lines to prevent ingress of dirt and moisture.