Side Parking Aid Camera Wiring Harness - Front Door Section: Installation
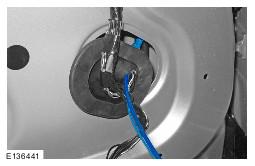
- Release the grommet.
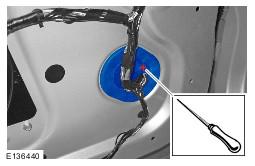
- Using a suitable tool, make a hole in grommet in the position shown.
- Install the camera overlay wiring harness.
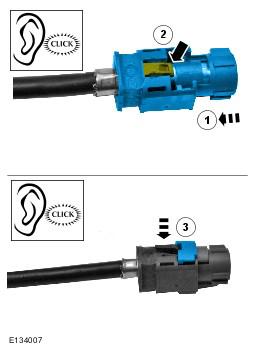
- Remove the connector from the camera wiring harness.
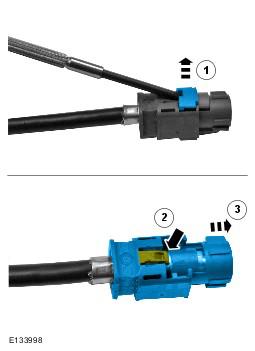
- Remove the locking tab.
- Carefully release the clip.
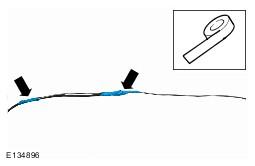
- Apply suitable tape to protect the end of the camera wiring harness.
- Using suitable tape, secure a suitable rod to the camera overlay wiring harness.
- Carefully feed the wiring harness through the grommet.
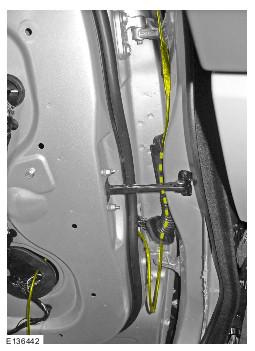
- Carefully feed the camera overlay wiring harness through the gaiter.
- Install the connector to the camera wiring harness.
- Remove the protective tape.
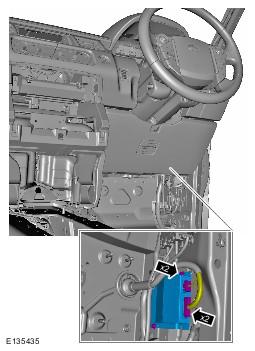
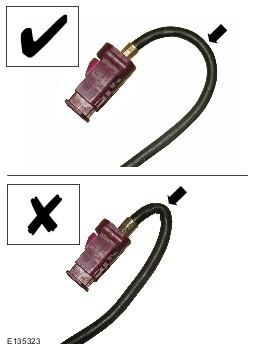
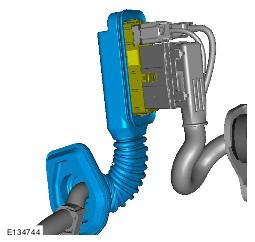
- Install the electrical connector.
- Secure the locking tab.
- Connect the electrical connector.
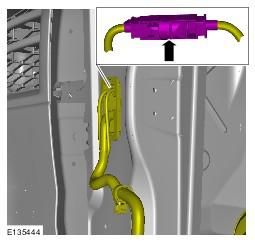
- Install the wiring harness cover.
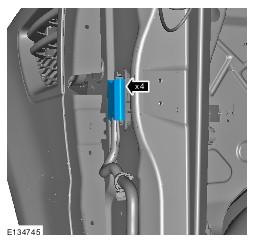
- Secure the 4 clips.
- Install the gaiter.
- Secure the bracket.
- Secure the 6 clips.
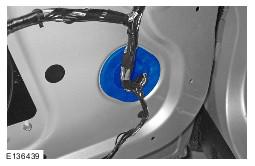
- Using suitable tie straps, secure the camera overlay harness to the door wiring harness.
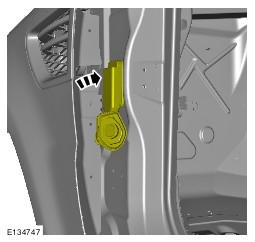
- Secure the grommet.
- If equipped, install the dynamic response control module.
- Tighten the 2 bolts.
- Connect the 2 electrical connectors.
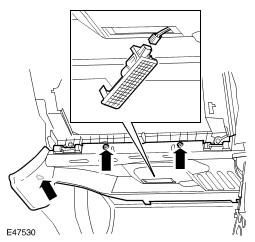
- Install the cowl side trim panel. Refer to: Cowl Side Trim Panel information.
- Install the closing trim panel.
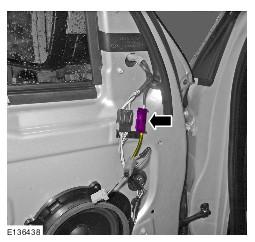
- Connect the electrical connector.
- Secure the clip.
- Tighten the screws.
- Connect the electrical connector.
- Install the front door trim panel. Refer to: Front Door Trim Panel information.
CAUTION:
Make sure that the camera overlay wiring harness is not bent excessively during this procedure. Failure to follow this instruction may result in damage to the harness.
NOTE:
Some variation in the illustrations may occur, but the essential information is always correct.
NOTE:
Some variation in the illustrations may occur, but the essential information is always correct.
CAUTION:
Make sure that excessive force is not used when installing the tie straps to the wiring harness. Failure to follow this instruction may result in damage to the vehicle.
CAUTION:
Make sure that the camera overlay harness is correctly routed and clear of the front door window regulator and motor. Failure to follow this instruction may result in damage to the vehicle.
NOTE:
RHD shown, LHD is similar.