HEATSHIELD Contact With Rear Driveshaft (JLRTB02090NAS1)
Reference number: JLRTB02090NAS1
HEATSHIELD CONTACT WITH REAR DRIVESHAFT
TECHNICAL SERVICE BULLETIN
| LAND ROVER: | All Models |
| SECTION: | 205-01 |
| SUBJECT/CONCERN: | Heatshield Contact With Rear Driveshaft |
CONTENT
MARKETS
NORTH AMERICA
CONDITION SUMMARY
SITUATION:
A metallic scraping noise can be heard from rear of vehicle during heavy braking.
ACTION:
Follow the instruction(s) below,
WARRANTY
- Repair procedures are under constant review, and therefore times are subject to change; those quoted here must be taken as guidance only. Use TOPIx to obtain the latest repair time.
- The JLR claims submission system requires the use of causal part numbers. Labor only claims must show the causal part number with a quantity of zero.
| DESCRIPTION | SRO | TIME (HOURS) | CONDITION CODE | CAUSAL PART |
|---|---|---|---|---|
| JLRTB - Heatshield Modification | 99.01.65 | 0.5 | * | LR144665 |
SERVICE INSTRUCTION
- Some components shown removed for clarity.
- Some variation in the illustrations may occur, but the essential information is always correct.
All vehicles
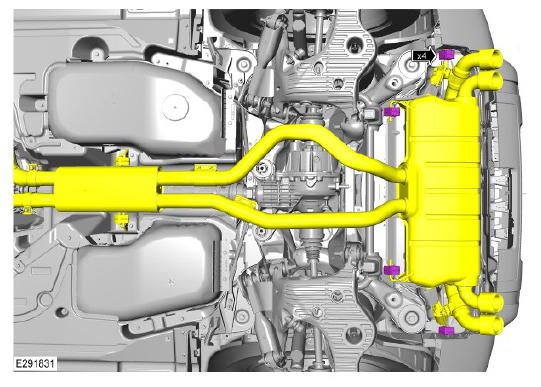
- Raise and support the vehicle on a suitable 2 post lift (see TOPIx Workshop Manual section 100-02: Jacking and Lifting - Description and Operation - Jacking and Lifting).
V8 5.0L petrol vehicles only
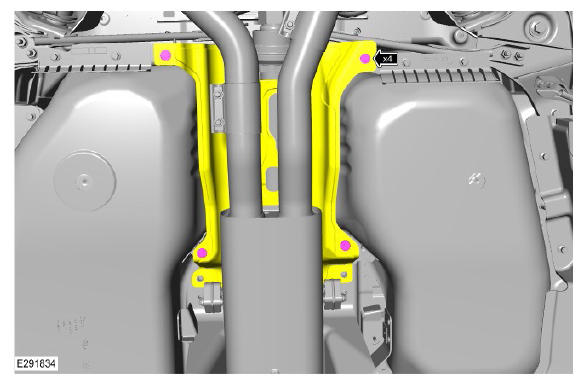
Release both center exhaust mounting brackets.
- Remove the 4 bolts.
- Torque: 27.5 Nm
- Remove the 4 bolts.
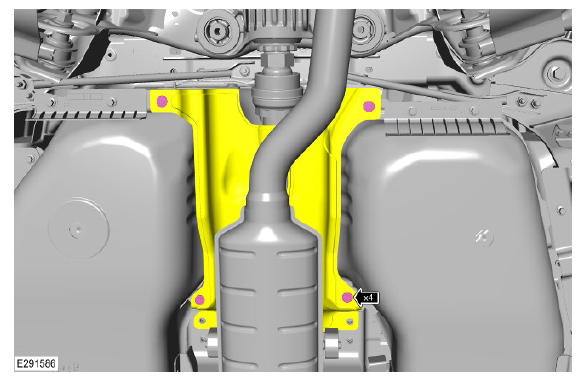
Remove the 4 heatshield bolts.
- Torque: 5.4 Nm
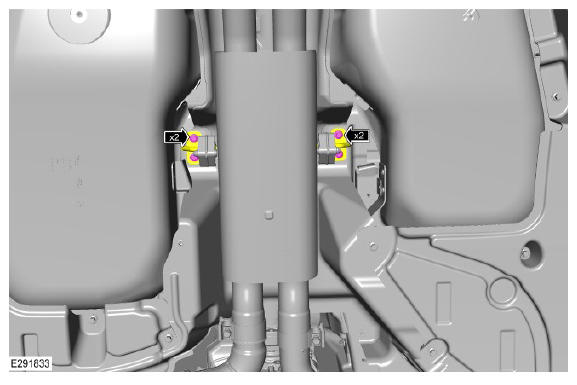
Disconnect the 2 electrical connectors from the 2 exhaust actuator control valves.
- Release the 4 clips.
Ingenium 14 2.0L and 16 3.0L petrol vehicles only
Release both center exhaust mounting brackets.
- Remove the 4 bolts.
- Torque: 27.5 Nm
- Remove the 4 bolts.
Remove the 4 heatshield bolts.
- Torque: 5.4 Nm
Ingenium 14 2.0L and 16 3.0L diesel vehicles only
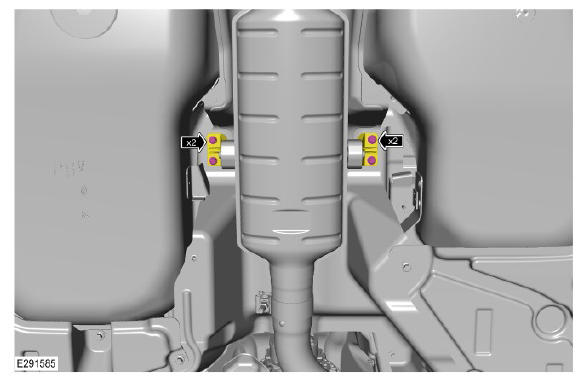
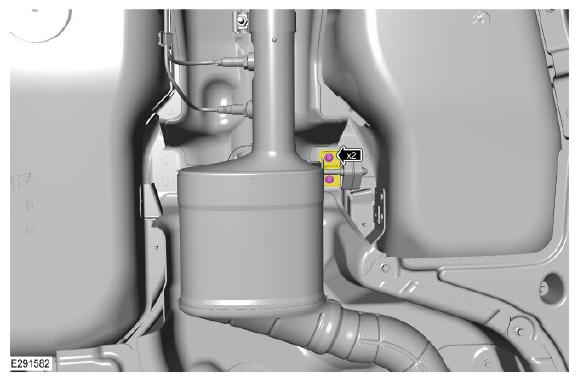
Release the center exhaust mounting bracket.
- Remove the 2 bolts.
- Torque: 27.5 Nm
- Remove the 2 bolts.
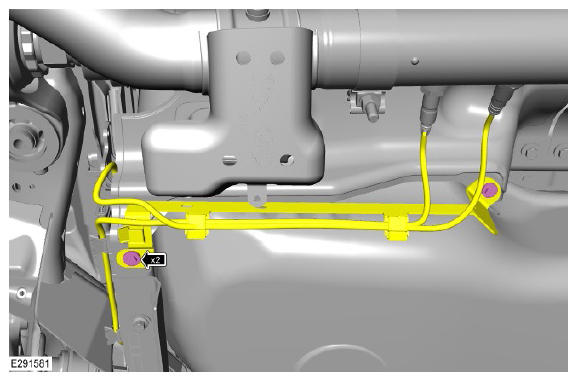
Release the NOx sensor wiring harness support bracket.
- Remove the 2 bolts.
- Torque: 9 Nm
- Remove the 2 bolts.
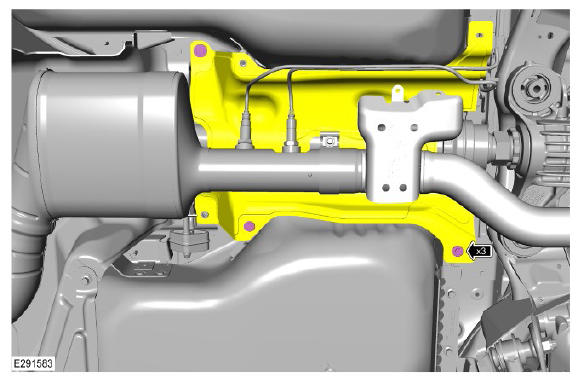
Remove the 3 heatshield bolts.
- Torque: 5.4 Nm
All vehicles
-
CAUTION: Make sure the exhaust is supported at all times using a suitable stand.NOTE:
- V8 5.0L petrol exhaust shown but Ingenium 14 2.0L and 16 3.0L diesel and petrol exhausts are similar.
- The number of exhaust mounting rubbers will differ depending on vehicle and emission specifications.
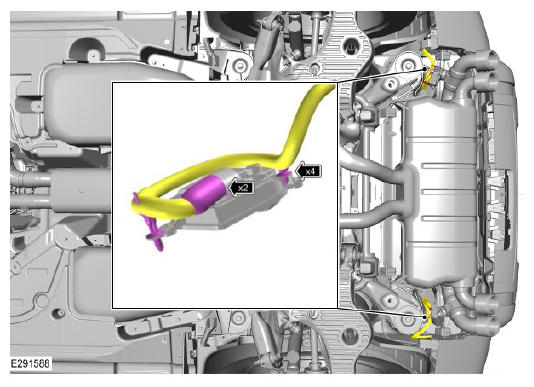
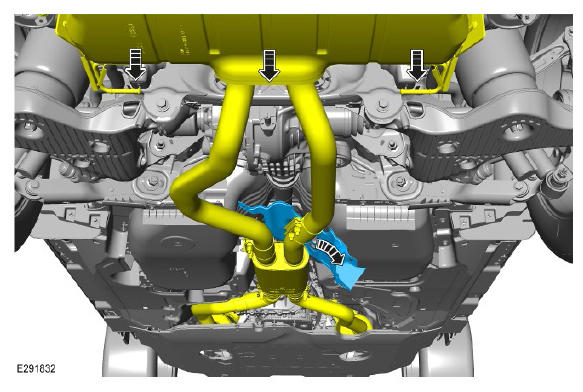
Release the 4 exhaust mounting rubber.
- CAUTION: Make sure the exhaust is supported at all times using a suitable stand.NOTE:
- V8 5.0L petrol exhaust shown but Ingenium 14 2.0L and 16 3.0L diesel and petrol exhausts are similar.
- Do not bend the heatshield during removal and installation.
Remove the heatshield in the direction shown in the illustration.
- Lower the rear of the exhaust to gain more access.
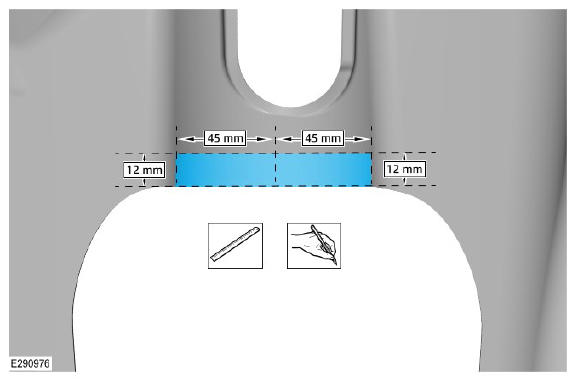
Using the measurements shown in the illustration, mark the area of the heatshield to be modified.
-
NOTE: Make sure the correct Personal Protective Equipment (PPE) is worn during this step.
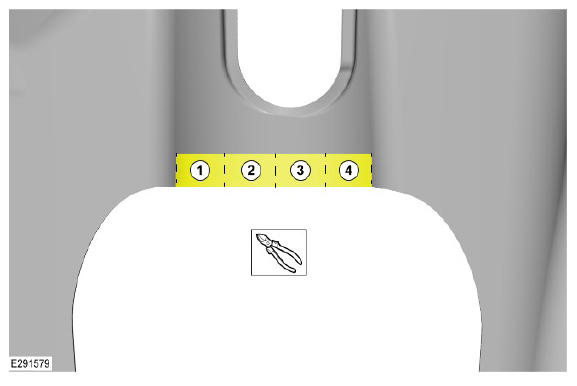
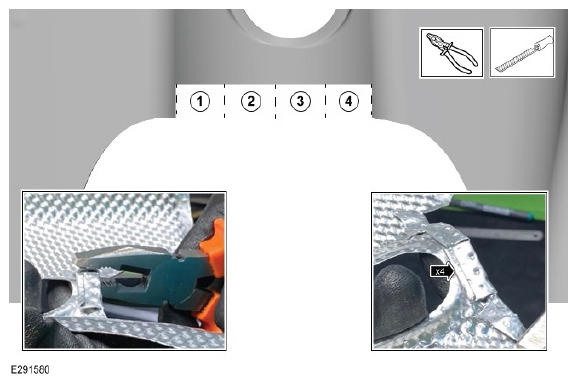
Using a suitable tool, make 5 cuts into the area of the heatshield marked in the previous step, to make 4 equal sections.
-
NOTE:
- Make sure the correct PPE is worn during this step.
- Do not flatten the rear driveshaft radius formed within the heatshield.
Using a suitable tool, bend each section towards the outside of the heatshield. Then compress each section into the heatshield to make sure they are flat as possible.
- Use a suitable file to remove any sharp edges created during the modification.
- To install, reverse steps 1 to 11.