5.0L Replacement Engine Will Not Start (DENSO Engine Management) (SSM62857)
Reference number: SSM62857
5.0L REPLACEMENT ENGINE WILL NOT START (DENSO ENGINE MANAGEMENT)
TECHNICAL SERVICE BULLETIN
| LAND ROVER: | LR4/L319, Range Rover/L322, Range Rover Sport/L320 |
| CATEGORY: | Engine |
SERVICE INFORMATION
Symptom 499000 Basic Engine
Attachments 11AJ133.pdf (11AJ133.pdf)
Content
ISSUE
A replacement AJ133 engine has been fitted into a vehicle. The engine cranks normally but will not start.
CAUSE
The engine may have been fitted with the wrong camshaft timing rings.
ACTION
Complete all primary diagnostics. If a cause is not found inspect the camshaft timing rings.
Information on torques and special tools, along with some aspects of this instruction, can be found in TOPIx section 303-01C (Timing Drive components).
Remove the camshaft covers and one of the Variable Valve Timing (VVT) upper engine covers.
Refer to the attached file for inspection criteria:
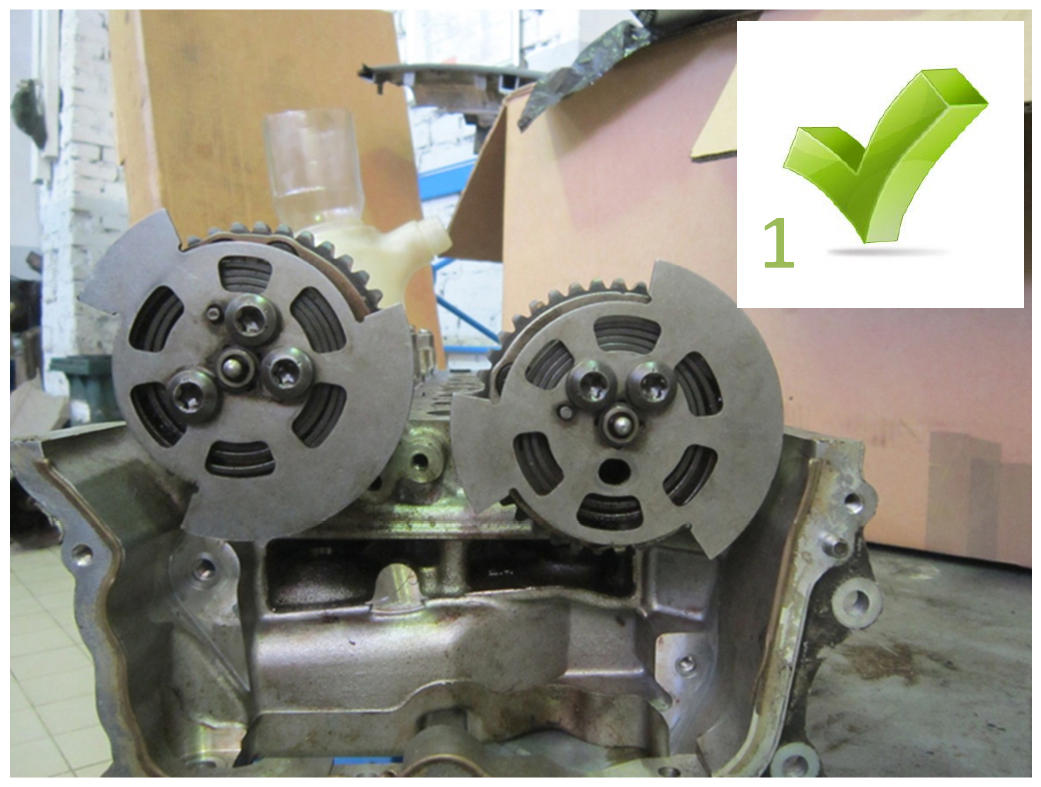
Picture 1 - this is the correct part for the engine - do not follow this procedure.
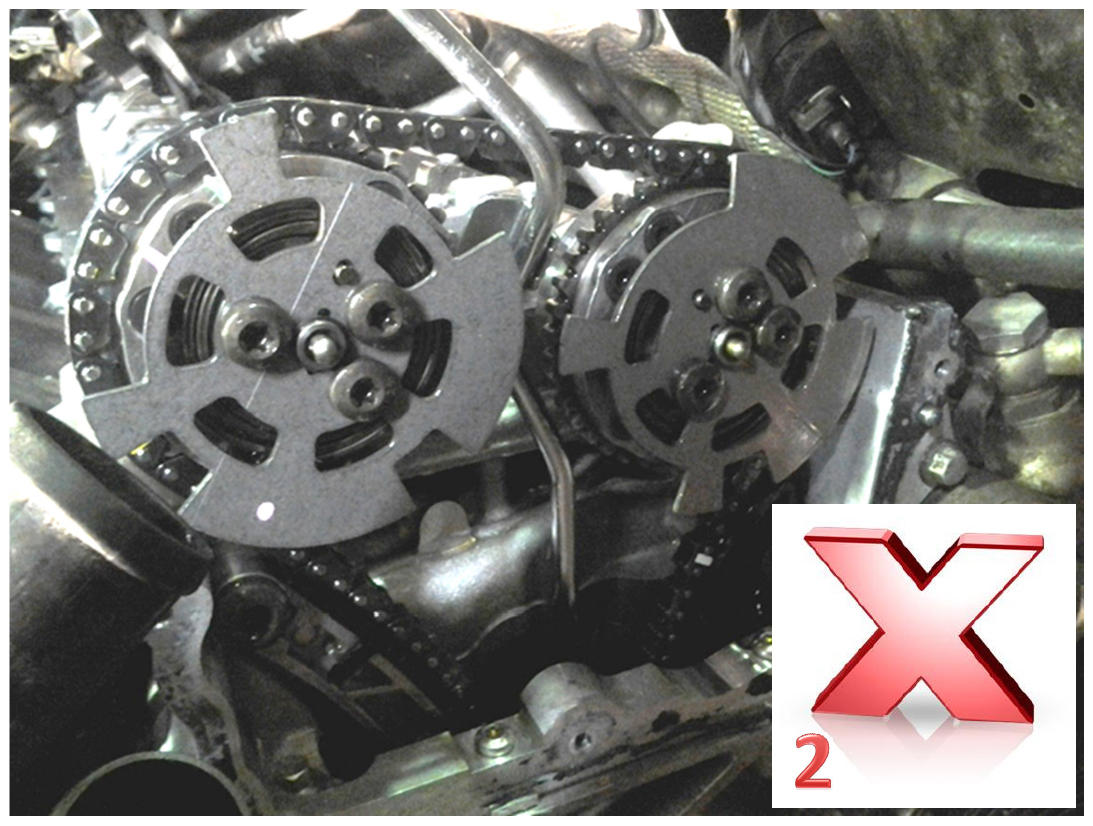
Picture 2 - this is the wrong part for the engine - follow the instruction below.
Process:
Remove the camshaft covers.
Time the engine to Top Dead Centre and lock using the correct cam locking tools.
Do not remove the crankshaft pulley or lower timing cover.
Remove the VVT covers.
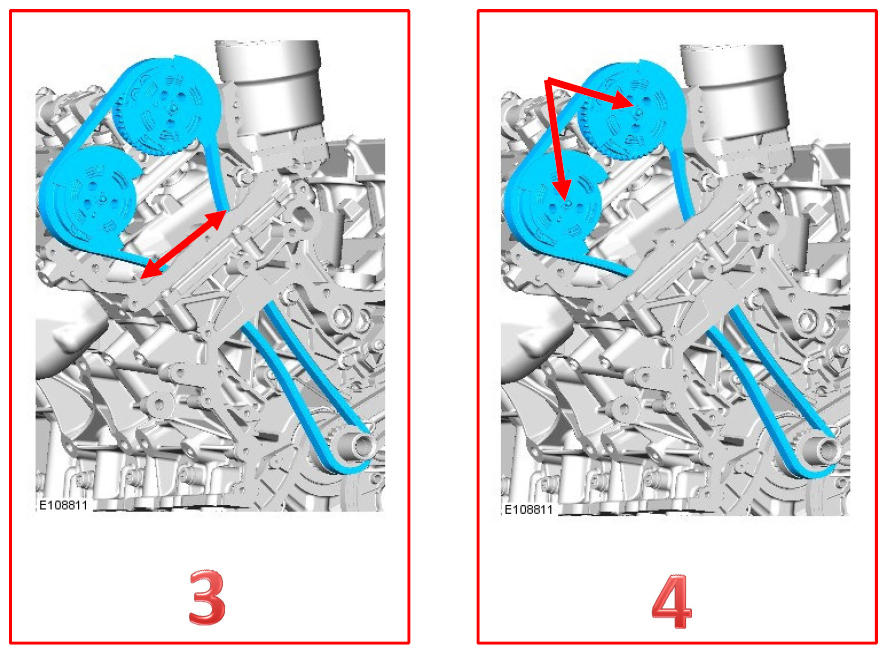
Picture 3 - Secure the timing chains using strong cable tie or vice grips. This must be done securely around the chain on each bank underneath the VVT units, so the chains do not become slack.
Picture 4 - While keeping the chain in position, carefully remove the circlip on the front of the VVT unit. The circlip is not needed and should be thrown away.
Carefully remove the torx bolts for one of the VVT sprockets and exchange the sensor ring from the original engine.
Repeat this procedure for the other VVT sprockets.
Once the torx bolts are secured to the correct torque setting, remove the vice grip/cable ties from the engine. Remove the engine locking tools.
Rotate by hand in clockwise direction the engine 4 times.
Check that the timing position is still correct. Retime the engine if necessary.
Rebuild the engine.