Squeak Noise From Steering Gear (LTB00154NAS4)
Reference number: LTB00154NAS4
Supersedes refnos: LTB00154, LTB00154NAS3
SQUEAK NOISE FROM STEERING GEAR
TECHNICAL SERVICE BULLETIN
| LAND ROVER: | 2005-2009 LR3 (LA); 2010-2016 LR4 (LA) |
| SECTION: | 211-02: Power Steering |
| VIN: | 000360-513325; 510742-847658 |
AFFECTED VEHICLE RANGE
| MODEL: | MODEL YEAR: | VIN: | ASSEMBLY PLANT: |
|---|---|---|---|
| LR3 (LA) | 2005-2009 | 000360-513325 | Solihull |
| LR4 (LA) | 2010-2016 | 510742-847658 | Solihull |
MARKETS:
NORTH AMERICA
CONDITION SUMMARY
SITUATION:
A 'squeak' noise may be heard from the steering column area when turning the steering wheel.
CAUSE:
This may be caused by a lack of lubrication to the power steering gear pinion seal.
ACTION:
Should a customer express this concern, follow the Service Instruction outlined below.
PARTS
| PART NUMBER | DESCRIPTION | QUANTITY |
|---|---|---|
| LR010545 | Steering rack pinion seal kit | 1 |
| QYG500100 | Steering column bolt | 1 |
| QYH500160 | Tie-rod end nuts | 2 |
| FC114136 | Steering gear mounting bolts | 2 |
| FS108166M | Screw M8 x 16 mm | 1 |
| LR020210 | 6 mm O-ring seal | 1 |
| LR009346 | 11 mm O-ring seal | 1 |
TOOLS
Refer to Workshop Manual for any required special tools.
WARRANTY
- Repair procedures are under constant review, and therefore times are subject to change; those quoted here must be taken as guidance only. Always refer to JLR claims submission system to obtain the latest repair time.
- The JLR Claims Submission System requires the use of causal part numbers. Labor only claims must show the causal part number with a quantity of zero.
| DESCRIPTION | SRO | TIME (HOURS) | CONDITION CODE | CAUSAL PART |
|---|---|---|---|---|
| Replace pinion oil seal - V6 3.0L S/C Petrol | 57.15.89.41 | 2.4 | 42 | LR011316 |
| Replace pinion oil seal - V6 4.0L Petrol | 57.15.89.41 | 2.2 | 42 | LR011316 |
| Replace pinion oil seal - V8 4.4L Petrol | 57.15.89.41 | 2.3 | 42 | LR011316 |
| Replace pinion oil seal - V8 5.0L Petrol | 57.15.89.41 | 2.2 | 42 | LR011316 |
SERVICE INSTRUCTION
- Remove steering gear (see TOPIx Workshop Manual section 211-02: Power Steering).CAUTION: Do not over tighten the vice or damage the feed pipes.
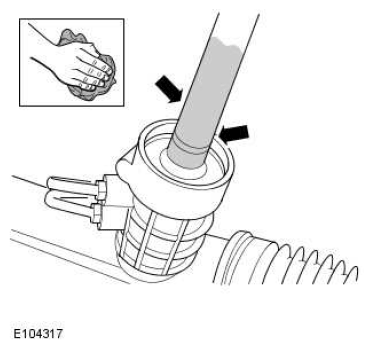
Secure steering gear in vice (using soft-jaws to protect the housing) with the pinion located vertically.
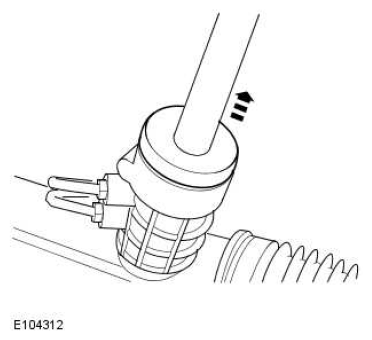
Remove (by hand) the top white dust cover and discard.
- Clean the cavity, housing, and shaft of any excess grease.
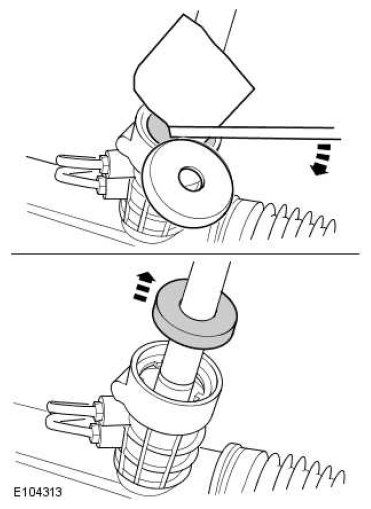
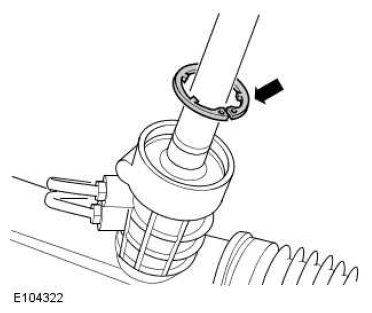
Using a suitable lever and a protective card to protect the pinion housing, pry the black dust excluder from the housing and discard.
Using suitable internal pliers, remove the circlip situated in the cavity and place aside.
Clean the cavity, housing and shaft of any excess grease.
Using a suitable lever, an 8mm flat screw driver and a protective card against the pinion, carefully prize the black top seal from the housing and discard.
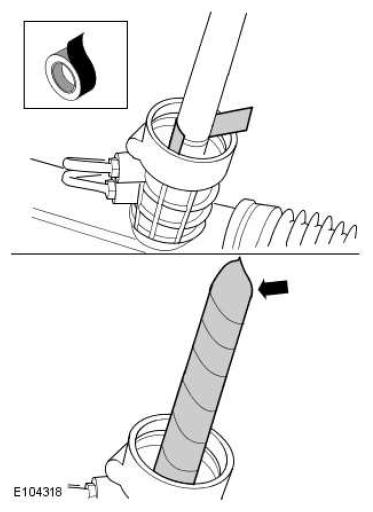
NOTE: If any gouge/scratch or damage has occurred to the internal surfaces of the housing, a new steering gear must be installed.Clean the pinion shaft and verify that no damage has occurred to the pinion diameter while removing the seal.
Place clean adhesive tape around the pinion (starting at the lower chamfer and winding upwards) to cover the input shaft completely.
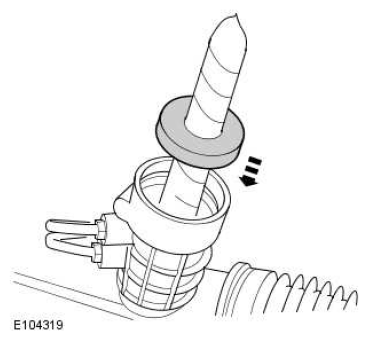
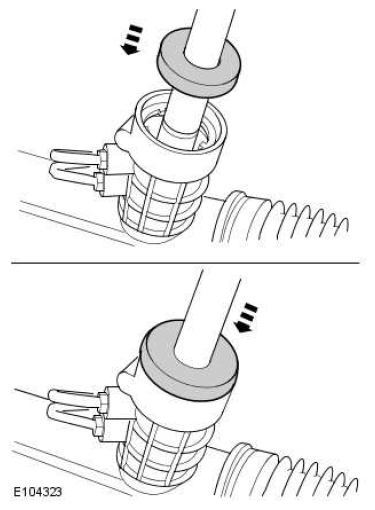
Install (by hand) the new hydraulic top seal over the pinion and slide down the pinion.
Use special tool LRT37-014 (308-518) to install the new seal; apply squarely and firmly into the housing against the top bearing.
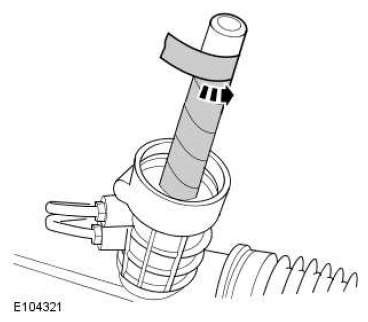
CAUTION: Do not use sharp objects to remove the adhesive tape.Peel off and remove all the adhesive tape from the pinion and discard.
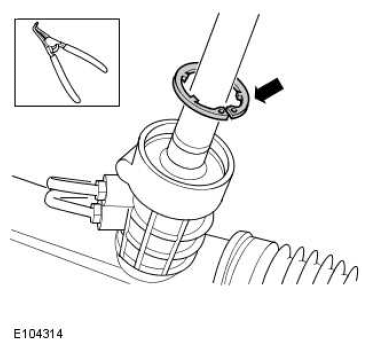
CAUTION: Ensure that the circlip is correctly located in the slot, by visually verifying by the extension of the circlip ears. Verify that the circlip gap is correct when installed, using suitable vernier callipers.Install the circlip, ensuring that the circlip is correctly located.
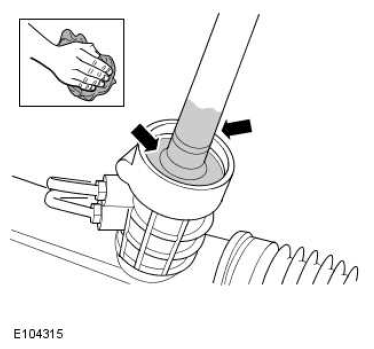
Install (by hand) the new dirt excluder and dust cover, ensuring that they are firmly seated.
- Install steering gear (see TOPIx Workshop Manual section 211-02: Power Steering).
- Start vehicle and check the area around the top of the steering housing for leaks.