Alpine Roof Blinds Not Latching (LTB00924NAS1)
WARNING: This page is about the LR4 Base, which is a different variant/trim than selected.
Publication date: 2016-03-30Reference number: LTB00924NAS1
ALPINE ROOF BLINDS NOT LATCHING
TECHNICAL SERVICE BULLETIN
Reference Number(s): LTB00924NAS1, Date of Issue:
March 30, 2016
| LAND ROVER: | 2010-2015 LR4 (LA) |
| SECTION: | 501-05 |
| AFFECTED VEHICLES: | LR4 (LA) Model Year: 2010-2015 VIN: 510178-776340 Assembly Plant: Solihull With: Roof Opening Panel |
MARKETS
NAS
CONDITION SUMMARY
Situation: The Alpine roof blinds may not latch in the closed position.
Cause: This may be caused by the roof blind latch(es) being out of alignment.
Action: Should a customer express this concern, follow the Service instruction below.
PARTS
PARTS INFORMATION
| CPF500020 | Spacer | Quantity: 4 |
TOOLS
Refer to Workshop Manual/Service Instruction for any required special tools.
WARRANTY
NOTE:
Repair procedures are under constant review, and therefore times are subject to change; those quoted here must be taken as guidance only. Always refer to TOPIx to obtain the latest repair time.
NOTE:
DDW requires the use of causal part numbers. Labor only claims must show the causal part number with a quantity of zero.
WARRANTY INFORMATION
| DESCRIPTION | SRO | TIME (HOURS) | CONDITION CODE | CAUSAL PART |
|---|---|---|---|---|
| Rear roof blinds - Modification | 76.13.89.41 | 0.9 | 42 | EGT500120LUM |
NOTE:
Normal Warranty procedures apply.
SERVICE INSTRUCTION
- Open the tailgate.
- Remove the left and right D-Pillar trim panel (see TOPIx Workshop Manual, section 501-05: Interior Trim and Ornamentation - D-Pillar Trim Panel).
- Remove the left and right C-Pillar trim panel (see TOPIx Workshop Manual, section 501-05: Interior Trim and Ornamentation - C-Pillar Upper Trim Panel).CAUTION: make sure no damage is caused when lowering the headliner.
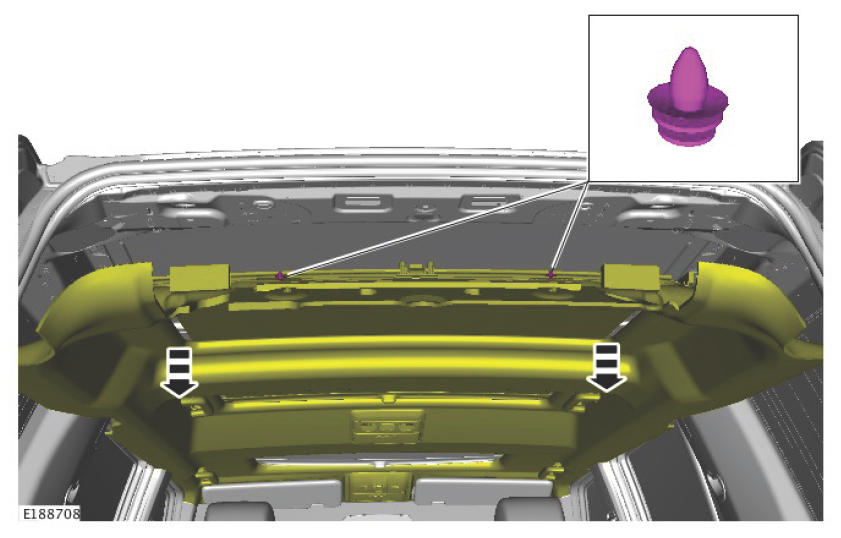
- Lower the rear headliner.
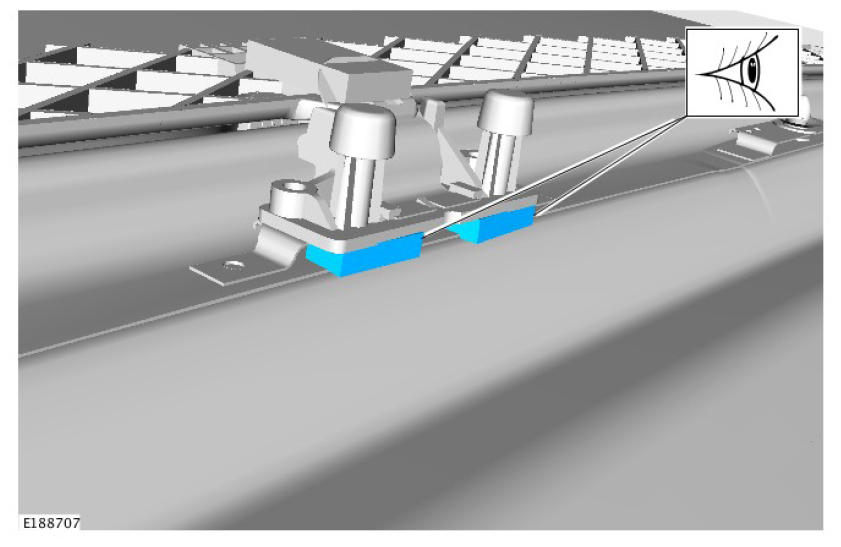
- Insert the two spacers.
- Make sure the two spacers are fully inserted.
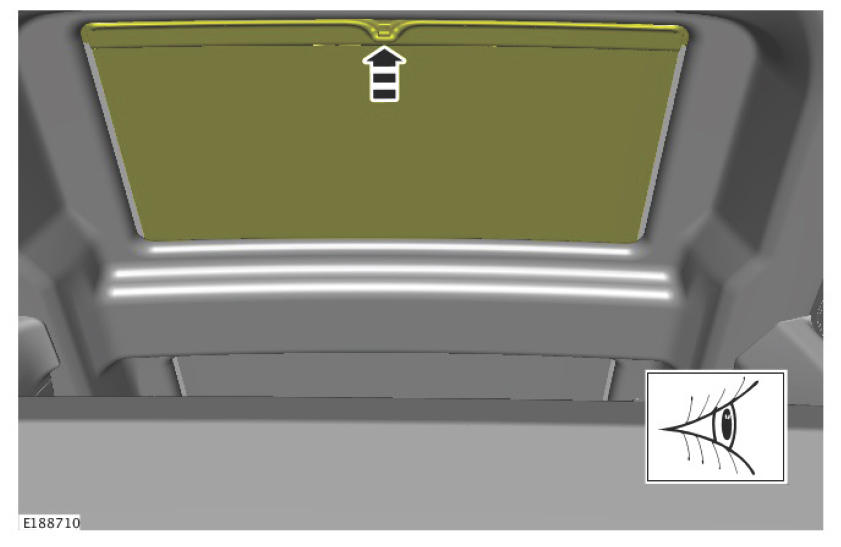
- Install the rear headliner.
- Install the two headliner retaining clips.
- Install the left and right C-Pillar trim panel (see TOPIx Workshop Manual, section 501-05: Interior Trim and Ornamentation - C-Pillar Upper Trim Panel).
- Install the left and right D-Pillar trim panel (see TOPIx Workshop Manual, section 501-05: Interior Trim and Ornamentation - D-Pillar Trim Panel).
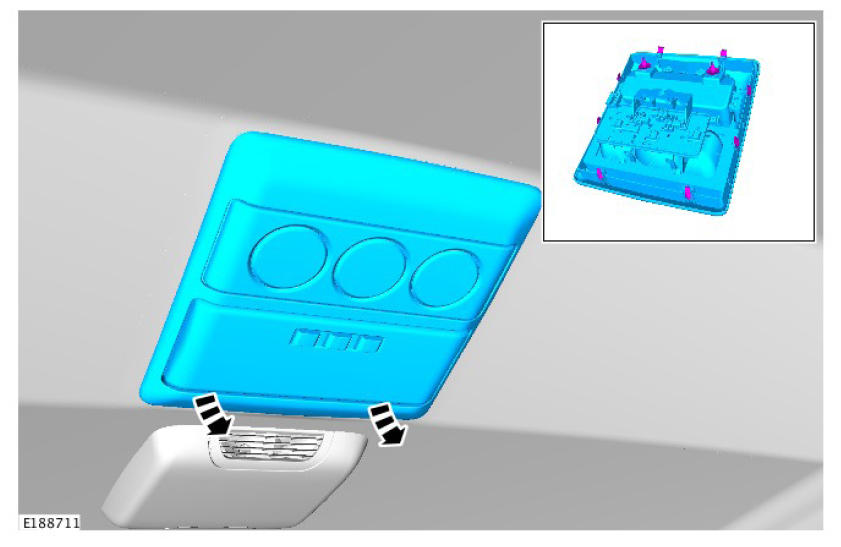
- Make sure the rear Alpine roof blind operates correctly.CAUTION: make sure no damage is caused to the headliner or the rear overhead consoleNOTE: do not disconnect the electrical connectors.
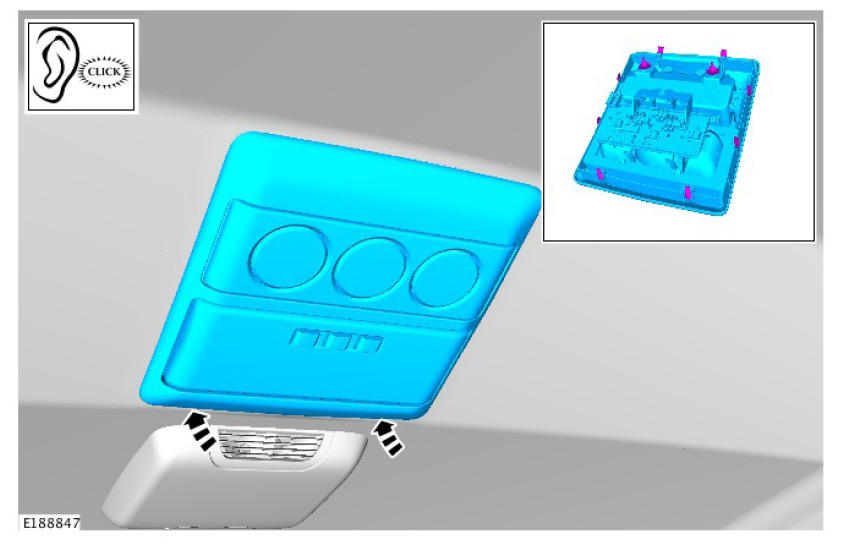
- Remove the rear overhead console.
- Release the two clips and the eight retaining lugs.
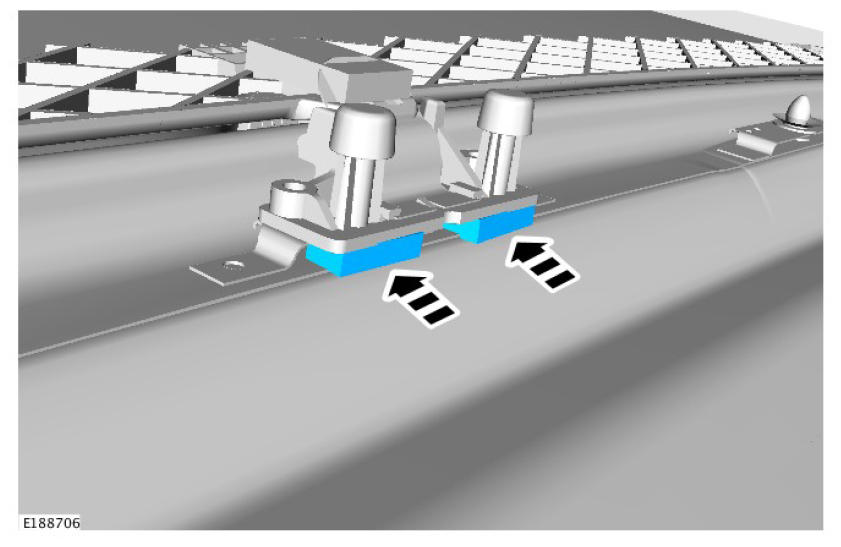
- Insert the two spacers.
- Make sure the two spacers are fully inserted.
- Make sure the rear Alpine roof blind operates correctly.
- Install the rear overhead console.
- Install the two clips and the eight retaining lugs.
- Close the tailgate.