Power Steering Pressure Test - (5.0L)
Special Tools
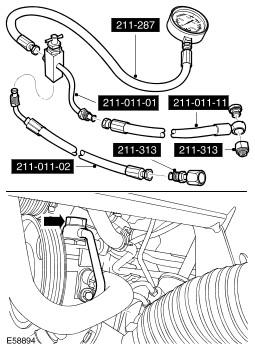
| Adapter, power steering test 211-313 (LRT-57-035A) | |
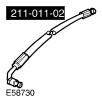
| Hose, power steering test 211-011-02 (LRT-57-002) | |
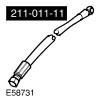
| Hose, power steering test 211-011-11 | |
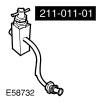
| Valve block, power steering test 211-011-01 (LRT-57-001) | |
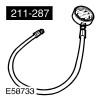
| Hose and gauge, power steering test 211-287 (LRT-57-005) | |
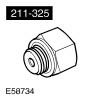
| Adapter, power steering test 211-325 (LRT-57-042) |

- Raise and support the vehicle.
- Disconnect the battery ground cable. Refer to Specifications article.
- Remove the radiator access panel.
- Remove the 4 bolts.
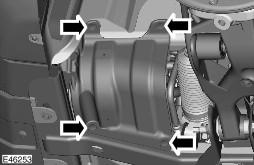
- Remove the front LH splash shield.
- Remove the 4 clips.
- Remove the front LH fender splash shield. Refer to Fender Splash Shield article.
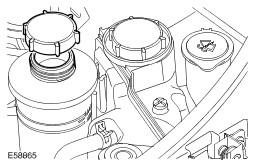
- Siphon the fluid from the power steering reservoir.
- Remove the filler cap.
- Install the filler cap.
- Position an absorbent cloth to collect fluid spillage.
- Disconnect the power steering high-pressure pipe union.
- Remove the bolt.
- Remove and discard the 2 sealing washers.
- Position a container to collect the fluid.
- Install the special tools to the power steering high-pressure port.
- Install the O-ring seal.
- Tie the pressure gauge aside under the hood.
- Install the special tool to the high-pressure union.
- Install the O-ring seals.
- Connect the special tool line, to the special tool valve block assembly.
- Refill the power steering reservoir.
- Remove the filler cap.
- Connect the battery ground cable. Refer to Specifications article.
- With the test valve open start the engine.
- Start the engine and turn steering fully lock to lock, stop the engine.
- Top-up the power steering fluid reservoir.
- Install the reservoir filler cap.
- For correct power steering pressures, refer to the steering specification section. Refer to See Specifications . .
- With the engine at idle, slowly turn the steering wheel and hold on full lock.
- Record the pressure reading.
- Repeat the above procedure for the other side.
- Record the pressure reading.
- With the engine at idle, release the steering wheel. The pressure should be, at or below, the pressure specified.
- Pressure outside this tolerance, indicates a fault.
- To determine if the fault is in the steering pump or the steering rack, close the test valve for a maximum of 5 seconds.
- If the pressures recorded fall outside the given values, replace the power steering pump.
- If the maximum pump pressure is correct, then suspect the power steering rack.
- On completion of the test stop the engine, disconnect the battery ground cable and siphon the steering fluid from the reservoir.
- Remove the filler cap.
- Install the filler cap.
- Disassemble the test equipment.
- Connect the high-pressure line to the power steering pump.
- Clean the component mating faces.
- Install the new O-ring seals.
- Tighten the bolt to 25 Nm (18 lb.ft).
- Install the front LH fender splash shield. Refer to Fender Splash Shield article.
- Install the front LH splash shield.
- Secure with the clips.
- Install the radiator access panel.
- Tighten the M6 bolts to 10 Nm (7 lb.ft).
- Tighten the M10 bolts to 45 Nm (33 lb.ft).
- Connect the battery ground cable. Refer to Specifications article.
- Refill and bleed the power steering. Refer to Power Steering System Filling and Bleeding article.
WARNING:
Do not work on or under a vehicle supported only by a jack. Always support the vehicle on safety stands.

CAUTION:
Before disconnecting or removing the components, ensure the area around the joint faces and connections are clean. Plug open connections to prevent contamination.
NOTE:
Some fluid spillage is inevitable during this operation.
NOTE:
Care must be taken to avoid contamination of the drive belt.
NOTE:
Ensure the steering components and test equipment are free from leaks.
NOTE:
Maintain the maximum fluid level during the test.
NOTE:
Make sure the steering is in the straight ahead position.
NOTE:
Under no circumstances must the low pressure spigot be removed from the steering pump.