External HD Service Tool Map Updates
Discovery 4, Range Rover Sport and Range Rover vehicles, equipped with a HDD (hard disc drive) integrated into the touch screen, are updated at point of service. Dealers are supplied with a set of master pack map update DVD's which are loaded onto the dealer Jaguar/Land Rover approved diagnostic equipment. The map data is then loaded from the diagnostic equipment onto the navigation tool hard drive. The map data is loaded to the touch s screen from the navigation tool hard drive.
The following process should be used to update the map data:
NOTE:
The navigation update tool does not need the map data loading every time. This is only necessary when a new map update DVD is released.
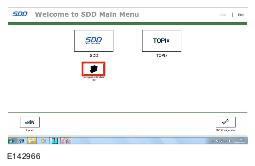
- Using the approved Jaguar/Land Rover diagnostic equipment select the navigation update tool.
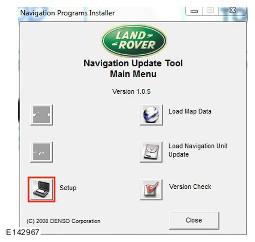
- Select Setup on the navigation update tool.
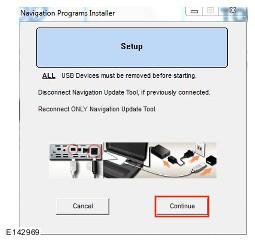
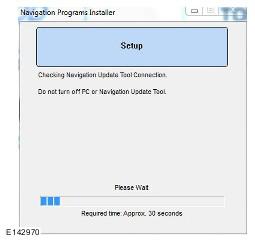
- Connect the navigation update tool to the Jaguar/Land Rover approved diagnostic equipment using the USB cable and press Continue proceed.
- The navigation update tool will then check the connection.
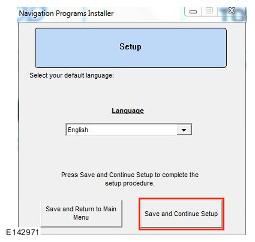
- Select your preferred language from the drop down menu then press Save and Continue Setup to proceed.
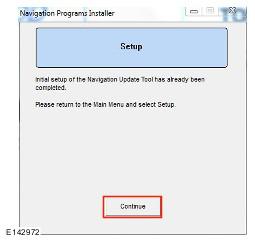
- When the navigation update tool confirms the initial setup is complete, press Continue to proceed.
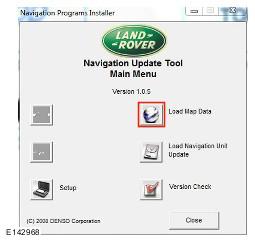
- The navigation update tool will the return to the main menu screen, select Load Map Data to proceed.
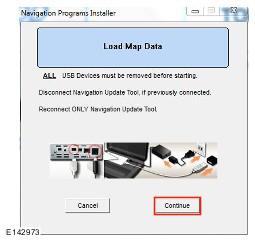
- Disconnect then reconnect, the USB cable connecting to the navigation update tool to the Jaguar/Land Rover approved diagnostic equipment, press Continue proceed.
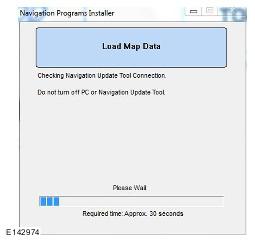
- The navigation update tool will then check the connection.
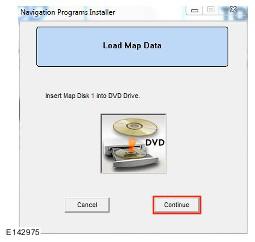
- Insert map update disk 1 into the DVD drive of the Jaguar/Land Rover approved diagnostic equipment and press Continue proceed
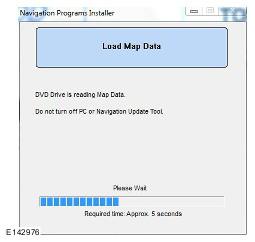
- The navigation update tool will then read the map data
- Map data will then be copied from disk 1 to the Jaguar/Land Rover approved diagnostic equipment.

- Insert map update disk 2 into the DVD drive and press Continue proceed
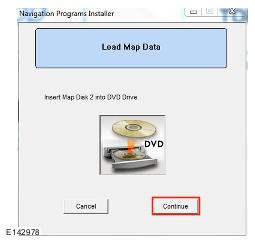
- Map data will then be copied from disk 2 to the Jaguar/Land Rover approved diagnostic equipment.

- Map data is now ready to be uploaded onto the navigation update tool, press Continue proceed.
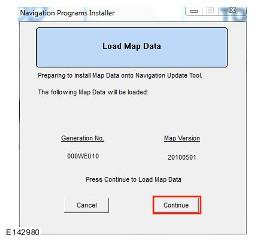
- The map data is now being uploaded onto the navigation update tool.

- Map data upload is now complete.
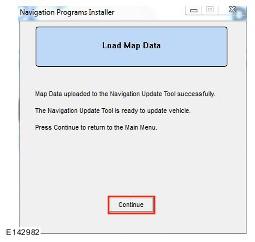
- Disconnect the navigation update tool from Jaguar/Land Rover approved diagnostic equipment.
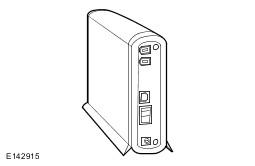
- Connect the navigation update tool to the vehicle using the firewire cable.
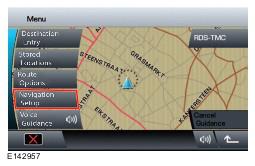
- Select Navigation using the touch screen display soft key.
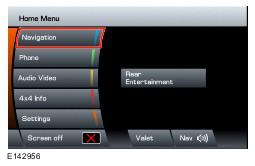
- Select Navigation Setup using the touch screen soft key.
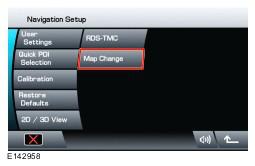
- Select Map Change using the touch screen.
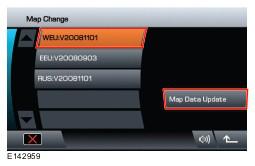
- Select map region using the touch screen display and press Map Data Update to continue.
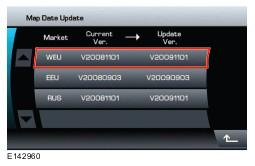
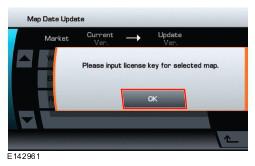
- The current map data version and the proposed update map data versions will now be shown, Select the relevant region, using the related touch screen key to proceed.
- Select OK to input the licence key using the touch screen.
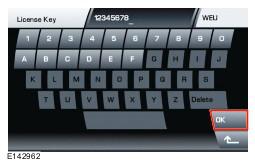
- Input the licence key using the touch screen display and press OK to continue.
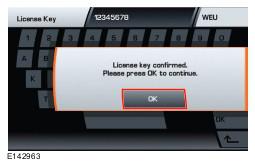
- Select OK using the touch screen.
- The map update will begin.
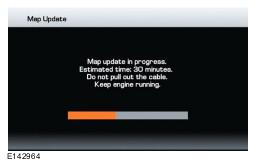
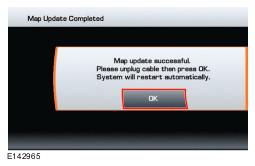
- When the map update is complete a message will be shown in the touch screen, select OK to continue using the touch screen display soft key. The navigation system will restart with the new map data.
- Disconnect the navigation update tool from the vehicle.