Exterior Front Door Handle: Removal
NOTE:
This procedure details removal and installation of both the LH and RH exterior front door handles.
NOTE:
If the exterior handle is to be removed in conjunction with additional door internal items, then it is recommended that the exterior handle and screw cover be released from the inside of the door, after removal of the door trim pad, regulator and motor.
- Remove the window regulator assembly. Refer to Front Door Window Regulator and Motor .
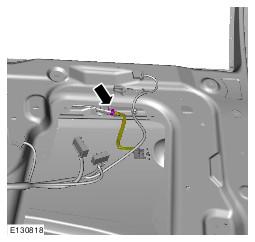
- Disconnect the electrical connector.
- LH side: Remove the private lock. See DOOR LOCK CYLINDER .
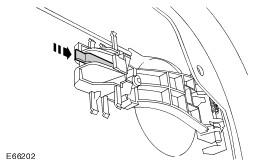
- RH side: Remove the screw cover.
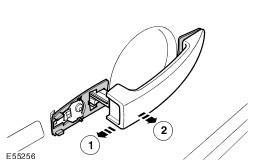
- Release the 2 clips.
- To remove the exterior front door handle, after removal of the door trim pad and regulator.
- Using a nylon mallet, carefully release the clip.
- Remove the 2 gaskets.
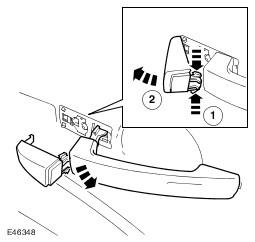
- To remove the exterior front door handle, without removal of the door trim pad.
- Slide the handle firmly rearward, then pivot the handle away from the door to remove it.
- Remove the 2 gaskets.
NOTE:
Vehicles with passive entry system.
NOTE:
All vehicles.
NOTE:
Removal of the screw cover may break the retaining clips.
NOTE:
If the screw cover is to be removed in conjunction with additional door internal items, then it is recommended that the screw cover be released from the inside of the door, after removal of the door trim pad, regulator and motor.
NOTE:
Vehicles without passive entry system.