Parking Brake Shoes: Removal
NOTE:
If the parking brake shoes or the brake discs have been removed for access to other components then DO NOT carry out the bedding in procedure.
- Using the Land Rover approved diagnostic system, drive the parking brake to the 'mounting position'.
- Isolate the parking brake electrical circuit.
- Remove fuse number 8 from the BJB.
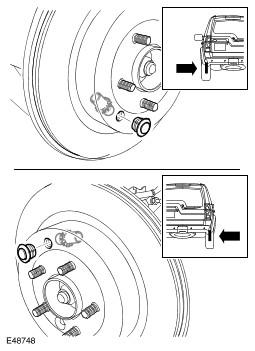
- Raise and support the vehicle.
- Remove the wheels and tires.
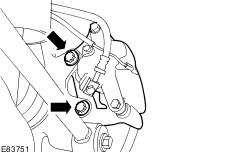
- Release the brake caliper.
- Remove the brake caliper anchor bolts.
- Tie the brake caliper aside.
- Release the park brake shoe adjustment.
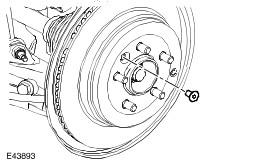
- Remove the plug from the access hole in the brake disc.
- Using a suitable tool, rotate the brake shoe adjuster to release the adjustment.
- Remove the brake disc.
- Remove the Torx screw.
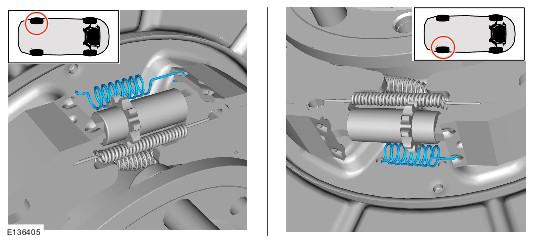
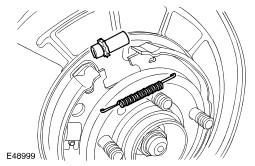
- Remove the bias spring(s).
- Remove the adjuster and return spring.
- Release the parking brake shoe adjuster to the minimum adjustment.
- Remove the primary brake shoe.
- Remove the hold-down spring and retaining pin.
- Pivot the shoe to release it from the spreader plate and return spring.
- Remove the spreader plate and spring.
- Remove the return spring.
- Remove the secondary brake shoe.
- Remove the hold-down spring and retaining pin.
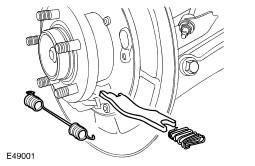
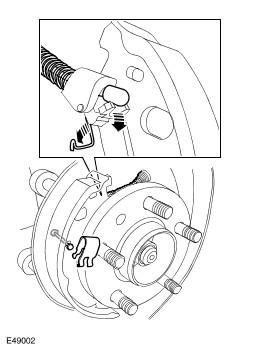
- Disconnect the parking brake cable retaining spring from the brake shoe lever.
- Release the parking brake cable.
- Repeat the above procedure for the other side.
WARNING:
Do not work on or under a vehicle supported only by a jack. Always support the vehicle on safety stands.
CAUTION:
Do not allow the brake caliper to hang on the brake hose.
CAUTION:
Make sure that the green bias spring is installed to the right hand parking brake shoes and the red bias spring is installed to the left hand parking brake shoes.
CAUTION:
Make sure the brake shoe spring is not over stretched.
NOTE:
If equipped.