Rear HALFSHAFT: Removal
CAUTION:
Do not allow halfshafts to hang unsupported at one end or joint damage will occur.
CAUTION:
Do not store or install halfshafts with joints at maximum articulation or damage may occur to the joint.
CAUTION:
Angularly Adjusted Roller (AAR) joints, used at the inboard end of some halfshafts have no internal retaining mechanism and can separate.
CAUTION:
Do not undo or remove the large protruding hexagon on the differential casing.
- Raise and support the vehicle.
- Drain the differential lubricant. Refer to Differential Draining and Filling .
- Remove the wheel and tire.
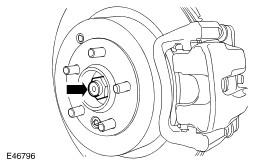
- Loosen the halfshaft retaining nut.
- Discard the nut.
- Remove the stabilizer bar link. Refer to Stabilizer Bar Link .
- Release the parking brake cable from the lower arm.
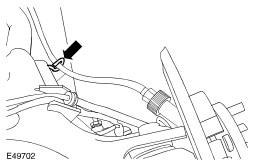
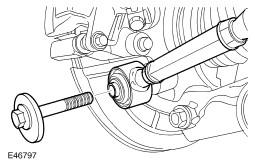
- Disconnect the toe link.
- Remove the bolt.
- Remove and discard the halfshaft retaining nut.
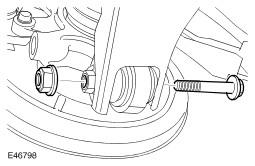
- Release the knuckle from the lower arm.
- Remove the bolt.
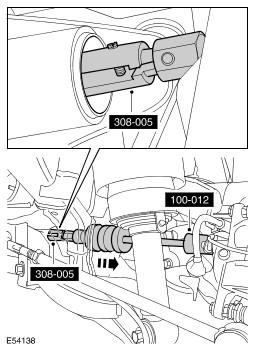
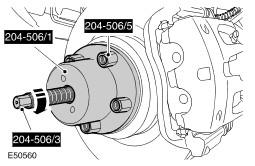
- Using the special tools, release the halfshaft from the wheel hub.
- Position a container to collect the oil spillage.
- Release the halfshaft from the differential housing.
- With assistance, remove the halfshaft.
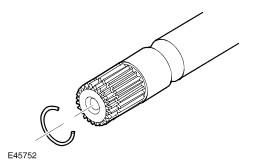
- Remove and discard the snap ring.
- Using the special tools, remove and discard the halfshaft oil seal.
WARNING:
Do not work on or under a vehicle supported only by a jack. Always support the vehicle on safety stands.
CAUTION:
Make sure the ball joint seal is not damaged. A damaged seal will lead to the premature failure of the joint.
CAUTION:
Do not use a hammer to detach the halfshaft from the hub assembly, failure to follow this instruction may result in damage to the halfshaft.