Drive Pinion Seal: Removal
CAUTION:
The input flange must not be change for one from another unit.
CAUTION:
The drive pinion seal must only be renewed for 1 repair.
- Raise and support the vehicle.
- Drain the differential lubricant. See Differential Draining and Filling .
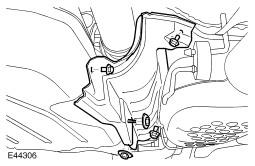
- Remove the fuel tank heat shield.
- Remove the 3 bolts and 2 nuts.
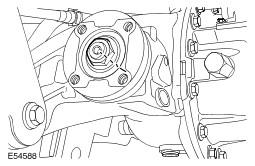
- Release the driveshaft from the rear axle drive pinion flange.
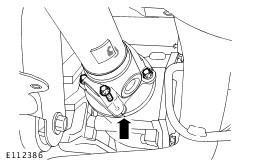
- Remove and discard the 4 Torx bolts.
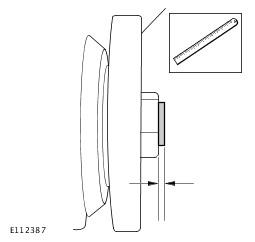
- Measure the depth of the pinion nut on the pinion shaft.
- Note measurement for installation.
- Accurately scribe a line to mark the drive pinion shaft to the drive pinion nut and pinion flange.
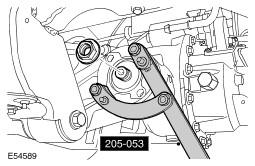
- Remove the drive pinion flange retaining nut.
- Using the special tool, counter hold the drive pinion flange.
- Note number of turns for installation.
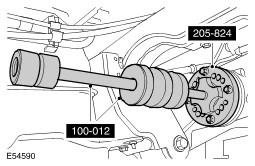
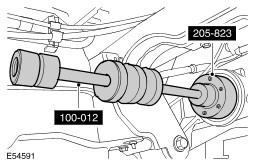
- Using the special tool, remove the drive pinion flange.
- Check flange seal journal for any damage.
- Using the special tool, remove the drive pinion seal.
WARNING:
Do not work on or under a vehicle supported only by a jack. Always support the vehicle on safety stands.
CAUTION:
Mark the position of the driveshaft flange in relation to the drive pinion flange.
CAUTION:
This step must be carried out to make sure that the drive pinion nut is correctly tightend on assembly.