Drive Pinion Seal: Installation
- Clean the drive pinion flange.
- Clean the drive pinion seal mating faces.
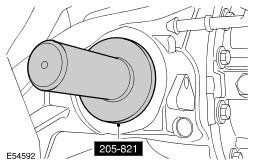
- Using the special tool, install the new drive pinion seal.
- Remove the special tool.
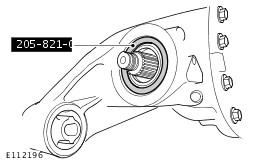
- Install special tool 205-821-01 to the seal face.
- Using the special tool, install the new drive pinion seal.
- Remove the special tools.
- Install the drive pinion flange.
- Install the drive pinion flange retaining nut.
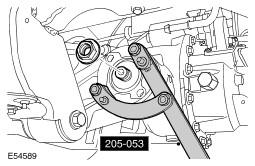
- Using the special tool, counter hold the drive pinion flange.
- Install nut to previously noted number of turns.
- Measure the depth of the pinion nut on the pinion shaft.
- Attach the driveshaft to the rear axle drive flange.
- Clean the component mating faces.
- Attach the driveshaft to the rear axle drive flange.
- Tighten the new Torx bolts to 150 Nm (110 lb.ft).
- Install the fuel tank heat shield.
- Tighten the bolts and nuts to 10 Nm (7 lb.ft).
- Fill the differential with the correct amount of lubricant. See Differential Draining and Filling .
CAUTION:
Make sure adaptor is removed or damage to the vehicle may occur.
CAUTION:
Make sure the drive pinion flange scribed marks are aligned.
CAUTION:
Make sure the mark on the drive pinion nut is never tightened short of the scribed mark on the drive pinion shaft.
CAUTION:
Make sure the drive pinion flange has no end float and is free to rotate.
CAUTION:
Make sure the scribed mark on the drive pinion nut is no more than a maximum of 5 degrees past the scribed mark on the drive pinion shaft.
CAUTION:
Make sure the correct specification and quantity of oil is used.