Axle Assembly: Removal
CAUTION:
Do not loosen or remove the large protruding hexagon on the differential casing.
- Raise and support the vehicle.
- Remove the rear wheels and tires.
- Remove the muffler assembly. Refer to REAR MUFFLER .
- Drain the differential fluid. See Differential Draining and Filling .
- Remove the RH rear halfshaft. Refer to Rear Halfshaft article.
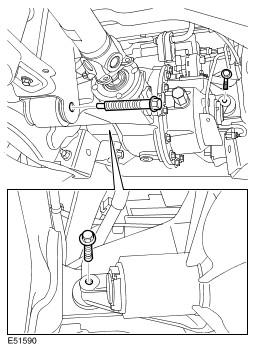
- Remove the LH rear stabilizer bar link.
- Remove and discard the 2 nuts.
- Release the parking brake cable from the LH lower arm.
- Release the LH rear toe link.
- Remove the bolt.
- Release the LH rear wheel knuckle from the lower arm.
- Remove the bolt.
- Using a suitable stand, support the LH rear wheel knuckle.
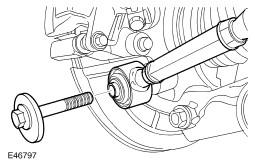
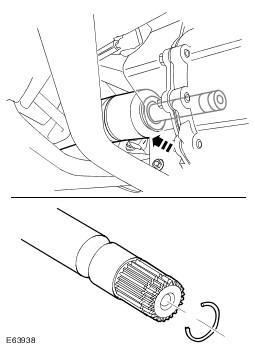
- Release the LH rear halfshaft from the axle assembly.
- Remove and discard the snap ring.
- Release the driveshaft from the rear axle drive flange.
- Remove and discard the 4 bolts.
- Support the driveshaft using a suitable tie strap.
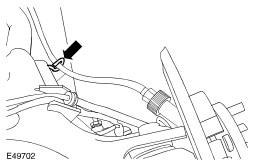
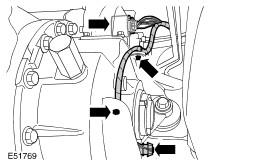
- Vehicles with differential locking motor: Disconnect the 2 electrical connectors.
- Release the 2 wiring harness clips.
- Using a transmission jack, support the rear axle assembly.
- With assistance, remove the rear axle assembly.
- Remove the 3 bolts.
- Disconnect the breather line.
WARNING:
Do not work on or under a vehicle supported only by a jack. Always support the vehicle on safety stands.
CAUTION:
Use a wrench on the hexagon provided to prevent the ball joint rotating.
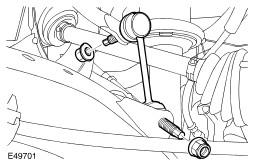
CAUTION:
Make sure the ball joint seal is not damaged. A damaged seal will lead to the premature failure of the joint.
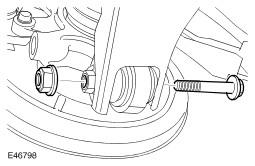
NOTE:
RH illustration shown, LH is similar
CAUTION:
Mark the position of the driveshaft flange in relation to the drive pinion flange.

CAUTION:
Before disconnecting or removing the components, make sure the area around the joint faces and connections are clean. Plug open connections to prevent contamination.