Cooling System Draining And Vacuum Filling: Filling
- Lower the vehicle.
-
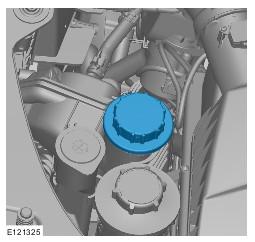
- Install the cooling system vacuum refill adaptor to the expansion tank.
- Install the vacuum filler gauge to the cooling system vacuum refill adaptor.
- Install the venturi tube assembly to the vacuum filler gauge.
- Connect a regulated compressed air supply to the venturi tube assembly.
- Position the evacuated air hose into a container.
- Open the air supply valve.
- Open the coolant supply valve for 2 seconds to prime the coolant supply hose.
- Apply air pressure progressively until the arrow on the vacuum filler gauge reaches the green segment.
- Disconnect the compressed air supply line.
- Open the coolant supply valve and allow the coolant to be drawn into the system.
- Remove the vacuum filler gauge and cooling system vacuum refill adaptor assembly.
- See figure
- Set the heater controls to maximum.
- Start the engine and idle until hot air is emitted at the face registers.
- Switch the heater off.
- Raise the engine speed to 2000 RPM for eight minutes.
- Switch the engine off.
- Visually check the engine and cooling system for signs of coolant leakage.
- Check and top-up the coolant if required.
CAUTION:
Anti-freeze concentration must be maintained at 50%.
NOTE:
Make sure the coolant supply valve is in the closed position on the vacuum filler gauge assembly.
NOTE:
The coolant vacuum fill tool needs an air pressure of 6 to 8 bar (87 to 116 psi) to operate correctly.
NOTE:
Small diameter or long airlines may restrict airflow to the coolant vacuum fill tool.
NOTE:
Make sure the coolant supply hose is positioned into a container of fifty percent mixture of Jaguar Premium Cooling System Fluid or equivalent, meeting Jaguar specification WSS M97B44-D and fifty percent water. Make sure no air can enter the coolant supply hose.
NOTE:
Close the coolant supply valve when the coolant expansion tank MAX mark is reached or coolant movement has ceased.
CAUTION:
Correct installation of the Coolant expansion tank cap can be obtained by tightening the cap until an audible click is heard.
CAUTION:
Observe the engine temperature gauge. If the engine starts to over-heat switch off immediately and allow to cool. Failure to follow this instruction may cause damage to the vehicle
CAUTION:
Switch off the engine and allow the coolant temperature to go cold.
WARNING:
When releasing the cooling system pressure, cover the coolant expansion tank cap with a thick cloth.
CAUTION:
Since injury such as scalding could be caused by escaping steam or coolant, make sure the vehicle cooling system is cool prior to carrying out this procedure
CAUTION:
Make sure the coolant level remains above the "COLD FILL RANGE" lower level mark.
NOTE:
When the cooling system is warm, the coolant will be approximately 10mm above the upper level mark on the expansion tank with the cap removed.