Removal And Installation: Headliner: Removal
- Remove both A-pillar upper trim panels. See A-Pillar Trim Panel .
- Remove both B-pillar upper trim panels. See B-Pillar Upper Trim Panel .
- Remove both C-pillar upper trim panels. See C-Pillar Upper Trim Panel .
- Remove both D-pillar upper trim panels. See D-Pillar Trim Panel .
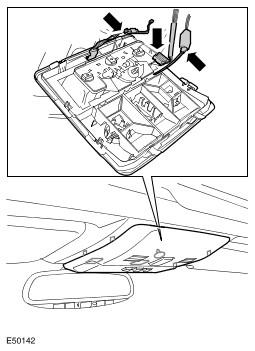
- Remove the front overhead console.
- Carefully release the 7 clips.
- Disconnect the 3 electrical connectors.
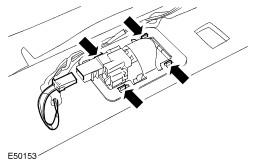
- Remove the rear overhead console.
- Carefully release the 9 clips.
- Disconnect the 2 electrical connectors.
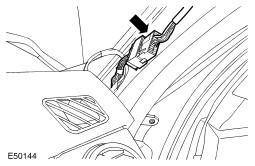
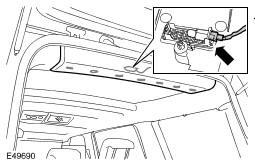
- Disconnect the RH A-pillar electrical connector.
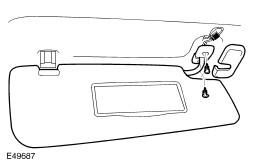
- Remove the sun visor.
- Remove the cover.
- Remove the 2 screws.
- Release from the clip.
- Disconnect the electrical connector.
- Repeat the above procedure for the other side.
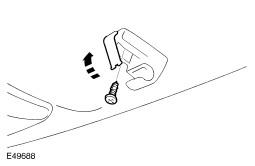
- Remove the sun visor retaining clip.
- Release the screw cover.
- Remove the screw.
- Repeat the above procedure for the other side.
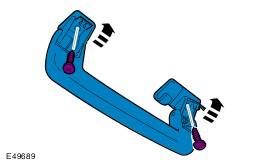
- Remove the passenger assist handle.
- Release the 2 screw covers.
- Remove the 2 screws.
- Repeat the above procedure for the remaining 5 handles.
- Position the front seats fully forward.
- Position the rear seats fully forward.
- Remove the rear headliner trim panel.
- Release the 7 clips.
- Disconnect the electrical connector.
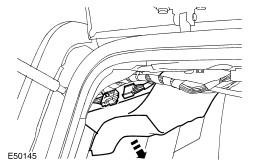
- Disconnect the headliner wiring harness rear electrical connector.
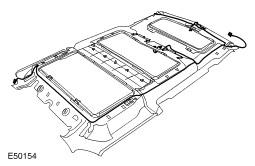
- With assistance, carefully remove the headliner.
- Release the 14 clips.
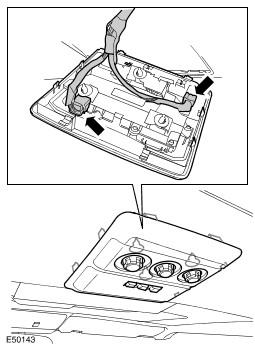
- Remove the rear interior lamp.
- Release the clip.
- Disconnect the electrical connector.
- Repeat the above procedure for the other side.
- Remove the headliner wiring harness.

NOTE:
Do not disassemble further if the component is removed for access only.