Instrument Panel Upper Section: Removal
NOTE:
Some variation in the illustrations may occur, but the essential information is always correct.
- Disconnect the battery ground cable. Refer to Specifications information.
- Make the SRS system safe. Refer to Standard Workshop Practices information.
- Remove the instrument panel driver side reinforcement. See Instrument Panel Driver Side Reinforcement .
- Remove the passenger side register trim panel. Refer to Passenger Side Register Trim Panel information.
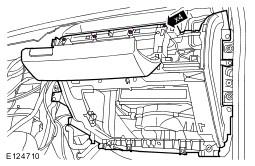
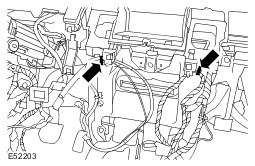
- Remove the stowage compartment tray.
- Release the 4 clips.
- Remove the instrument panel speaker. Refer to Instrument Panel Speaker information.
- Remove both A-pillar upper trim panels. Refer to A-Pillar Trim Panel information.
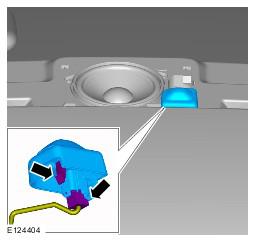
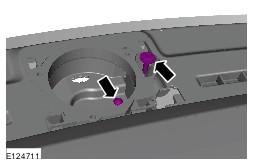
- Remove the sunload sensor.
- Release the clips.
- Disconnect the electrical connector.
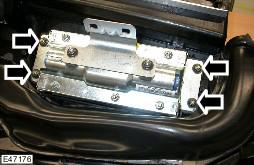
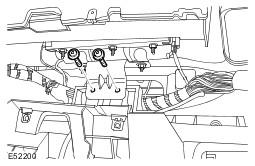
- Remove the instrument panel passenger side reinforcement upper retaining screws.
- Release the passenger air bag module bracket.
- Remove the 2 Torx screws.
- Disconnect the 3 electrical connectors from the passenger air bag module.
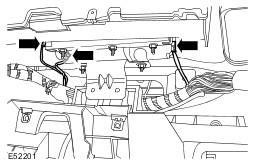
- Remove 1 Torx screw and 1 bolt, from the instrument panel upper section speaker aperture.
- Release the instrument panel wiring harness.
- Release the 2 clips.
- With assistance, remove the instrument panel upper section.
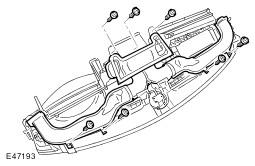
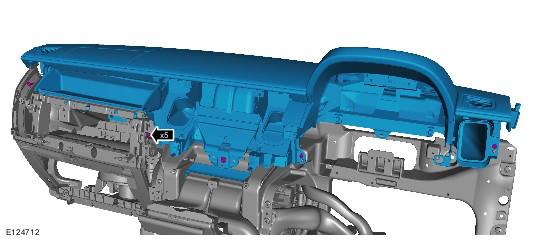
- Remove the 5 Torx screws.
- Remove the passenger air bag module.
- Remove the 4 nuts.
- Remove the windshield defroster duct.
- Remove the 7 screws.

NOTE:
Avoid dropping the screw inside the instrument panel.
NOTE:
Do not disassemble further if the component is removed for access only.