Transmission - V8 5.0L Petrol: Removal
NOTE:
Some variation in the illustrations may occur, but the essential information is always correct.
NOTE:
Some illustrations may show the transmission removed for clarity.
NOTE:
Some illustrations may show the engine removed for clarity.
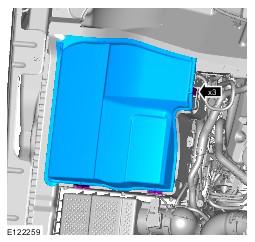
- Remove the battery.
Refer to: BATTERY .
- Raise and support the vehicle.
- Refer to: Rear Driveshaft - Removal and Installation .
- Refer to: EXHAUST SYSTEM .
- Refer to: Front Driveshaft - Removal and Installation (5.0L) .
- Refer to: Axle Assembly .
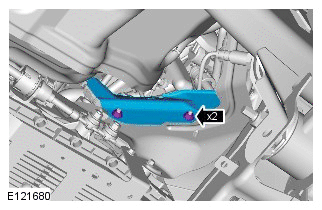
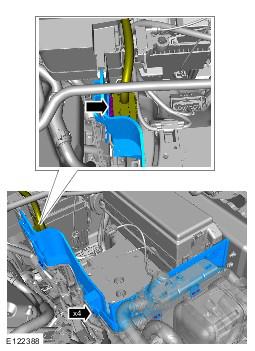
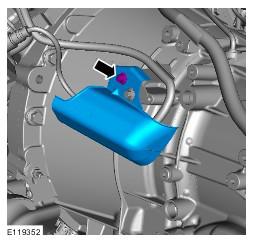
- See figure.
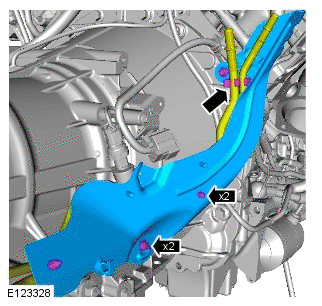
- See figure.
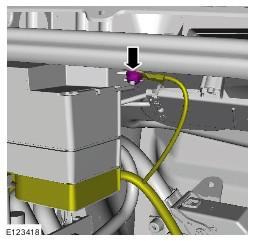
- See figure.
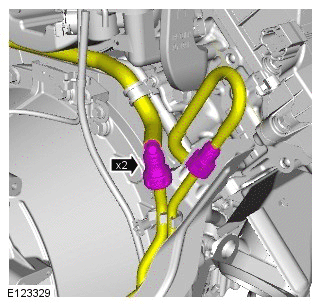
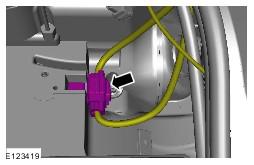
- See figure.
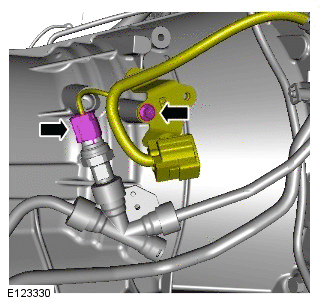
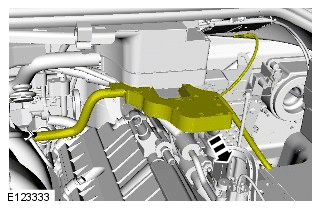
- See figure.
- See figure.
- See figure.
- See figure.
- See figure.
- See figure.
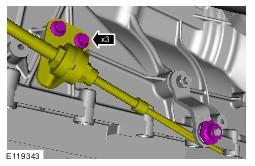
- Remove and discard the 2 O-ring seals.
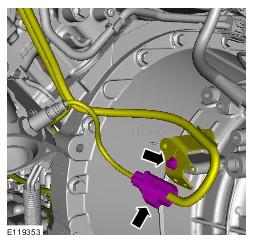
- See figure.
- See figure.
- See figure.
- See figure.
- See figure.
- See figure.
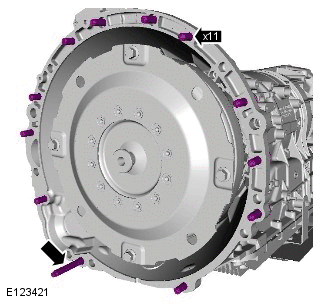
- See figure.
- See figure.
- See figure.
- See figure.
- See figure.
- See figure.
- Make sure that the alignment mark is visible through the inspection hole on removal of the last torque converter bolt.
- Lower the rear of the transmission for access.
- See figure.
- See figure.
- See figure.
-
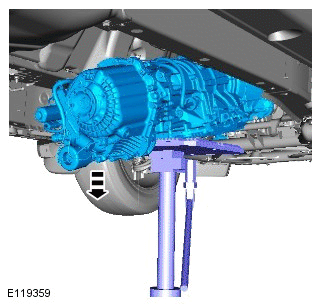
- Using a suitable hydraulic jack, support the transmission.
- Do not disassemble further if removed for access only
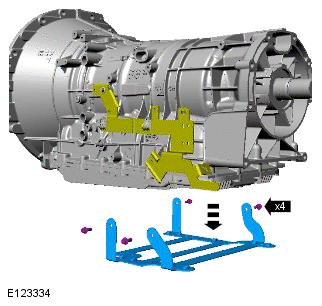
- Install the torque converter retainer.
WARNING:
Make sure to support the vehicle with axle stands.
WARNING:
Do not smoke or carry lighted tobacco or open flame of any type when working on or near any fuel related components. Highly flammable vapors are always present and may ignite. Failure to follow these instructions may result in personal injury.
CAUTION:
Be prepared to collect escaping fluids.
WARNING:
Be prepared to collect escaping fluids.
CAUTION:
Make sure that all openings are sealed. Use new blanking caps.
NOTE:
RHD illustration shown, LHD is similar.


CAUTION:
Only rotate the crankshaft clockwise.
WARNING:
Make sure that the transmission is secured with suitable retaining straps.
CAUTION:
Make sure that the torque converter remains in the transmission.
NOTE:
This step requires the aid of another technician.