Transfer Case Front Output Shaft Seal V8 5.0L Petrol: Removal
- Disconnect the battery ground cable. Refer to Specifications .
- Raise and support the vehicle.
- Drain the transfer case fluid. See TRANSFER CASE DRAINING AND FILLING .
- Remove the transfer case. See TRANSFER CASE - 5.0L .
- With assistance, secure the transfer case with its transmission mating face down on a flat surface.
- Secure with 2 bolts.
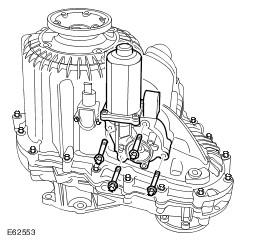
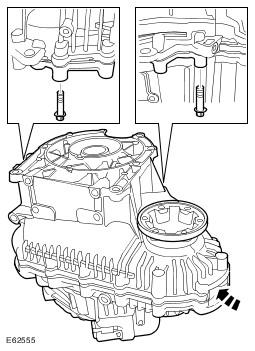
- Remove the shift motor.
- Remove the 4 bolts.
- Remove any debris from the bolt holes.
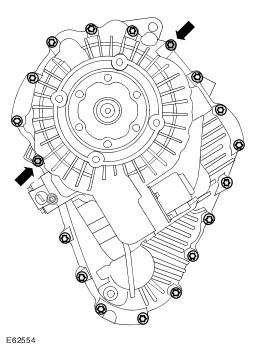
- Remove 17 Torx bolts securing the transfer casings.
- The two bolts indicated remain fully tightened.
- Remove any debris from the bolt holes.
- With assistance, release the transfer case and secure with the rear face of the transfer case facing down on a flat surface.
- Remove the front half of the transfer case.
- Remove the remaining 2 Torx bolts.
- Remove any debris from the bolt holes.
- Use a soft faced mallet.
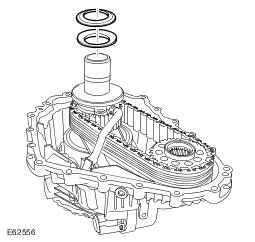
- Remove the 2 special washers.
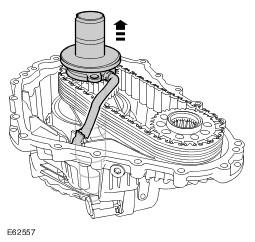
- Remove the input shaft and oil pump assembly.
- Release the fluid pump pickup line.
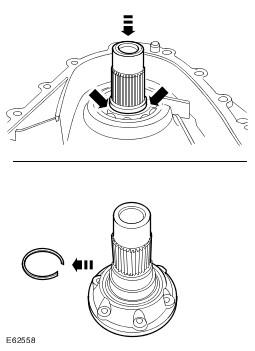
- Remove the front output flange.
- Compress the snap ring.
- Press the flange through the bearing.
- Remove and discard the snap ring.
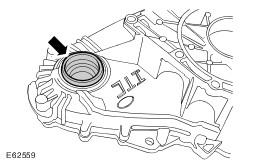
- Remove the output flange seal.
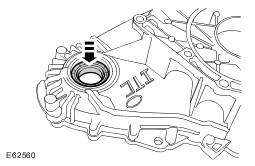
- Remove the output flange bearing.
WARNING:
Do not work on or under a vehicle supported only by a jack. Always support the vehicle on safety stands.
WARNING:
Eye protection must be worn.
WARNING:
Eye protection must be worn.
WARNING:
Eye protection must be worn.
CAUTION:
Care must be taken to avoid damage to the mating surfaces.
CAUTION:
Note the fitted position of the special washers.
CAUTION:
Care must be taken to avoid damage to the seal register and running surface.