Transfer Case Rear Output Shaft Seal V6 4.0L Petrol: Installation
- Remove the sealant from the transfer case mating faces.
- Clean the magnetic filter.
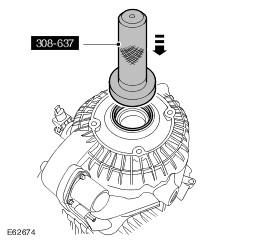
- Using the special tool, install the output flange bearing.
- Clean the components mating faces.
- Install the circlip.
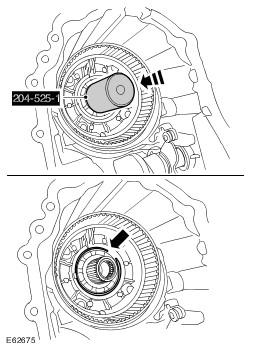
- Using the special tool, install a new oil seal.
- Clean the component mating faces.
- Grease the new seal.
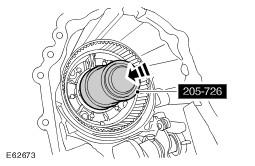
- Using the special tool and with assistance, install the drive flange.
- Clean the component mating faces.
- Install a new snap ring.
- Make sure the snap ring is fully engaged and retains the drive flange.
- Secure the rear half of the transfer case with its rear face down on a flat surface.
- Install the differential module.
- Clean the components.
- Install the spacer.
- Install the clutch.
- Clean the components.
- Engage the actuator levers.
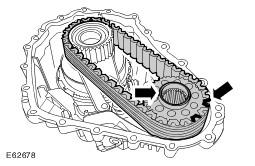
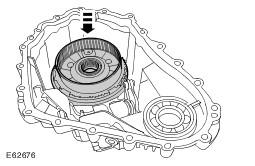
- Install the chain and sprocket.
- Clean the components.
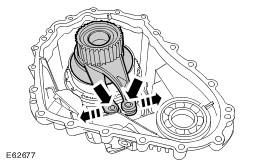
- Apply a 2 mm bead of sealant to one surface of the transfer case mating face, as shown.
- Clean the component mating faces.
- Clean the dowels and dowel holes.
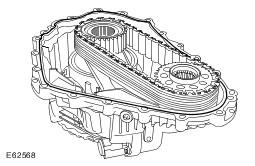
- Install the front half of the transfer case.
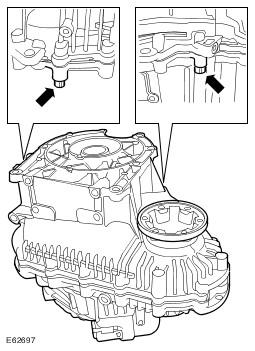
- Evenly tighten the 2 Torx bolts shown to 35 Nm (26 lb.ft).
- Tighten the remaining Torx bolts to 35 Nm (26 lb.ft).
- Install the shift motor.
- Clean the components.
- Tighten the Torx bolts to 25 Nm (18 lb.ft).
- With assistance, release the transfer case from the flat surface.
- Remove the 2 bolts.
- Install the transfer case. See TRANSFER CASE - 4.0L .
- Refill the transfer case with the recommended fluid. See TRANSFER CASE DRAINING AND FILLING .
- Connect the battery ground cable. Refer to Specifications .
CAUTION:
The chamfer on the bearing inner track must face the seal.
CAUTION:
Centralize the snap ring in the snap ring groove before installing the output flange.
CAUTION:
Extreme care is necessary to make sure the snap ring enters the bearing squarely.
NOTE:
Rotate the differential to engage the splines.
NOTE:
Rotate the assembly to engage the clutch plates.
NOTE:
Use circlip pliers to open the actuator levers.
CAUTION:
The dark links in the chain face up as shown.
NOTE:
The relieved splined inner diameter of the sprocket must face up as shown.