Oil Pan Extension: Removal
NOTE:
Removal steps in this procedure may contain installation details.
NOTE:
Some variation in the illustrations may occur, but the essential information is always correct.
- Disconnect the battery ground cable. Refer to SPECIFICATIONS information.
- Raise and support the vehicle.
- Refer to: CRANKSHAFT PULLEY .
- Refer to: ENGINE
- See Figure
- See Figure
- See Figure
- See Figure
- See Figure
- See Figure
- See Figure
- See Figure
- See figure
- See Figure
- See Figure
- See Figure
- See Figure
- See Figure
- See figure
- See Figure
- See Figure
- See Figure
- See figure
- See figure
- See Figure
- See figure
- See figure
- See Figure
- See figure
- See Figure
- See Figure
- See figure
- See figure
WARNING:
Do not work on or under a vehicle supported only by a jack. Always support the vehicle on safety stands.
CAUTION:
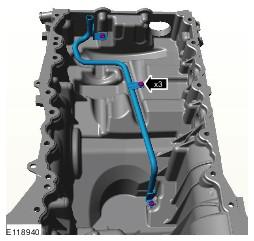
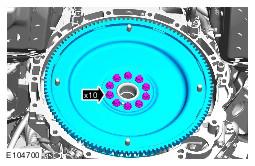
The bolts can only be used 3 times, mark the bolts with a center punch. If 2 punch marks are visible, discard the bolts.
CAUTION:
Make sure that no components fall off during removal.
NOTE:
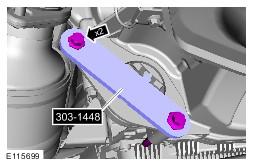
Make sure that the crankshaft is not rotated.
NOTE:
Make sure the crankshaft and flexplate mating faces are clean before installation.
NOTE:
The high-pressure fuel pumps are removed from the illustration for clarity.
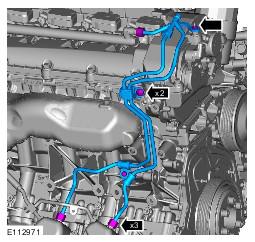
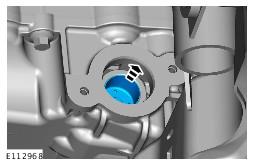
CAUTION:
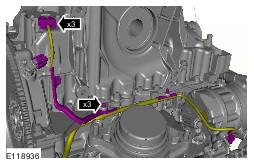
Be prepared to collect escaping fluids.
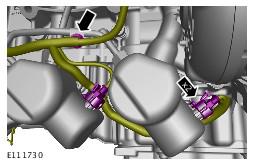
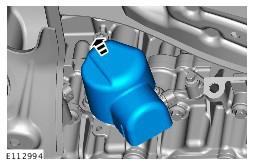
CAUTION:
Be prepared to collect escaping fluids.
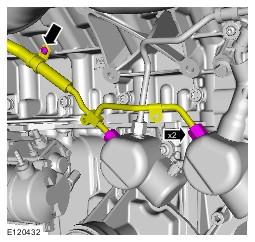
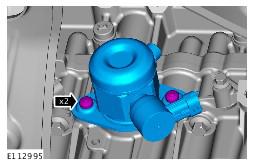
CAUTION:
Be prepared to collect escaping fluids.
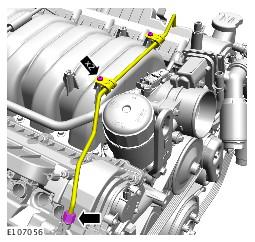
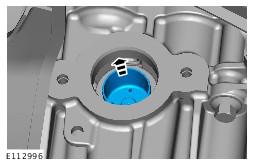
CAUTION:
Be prepared to collect escaping fluids.
NOTE:
Discard the component.
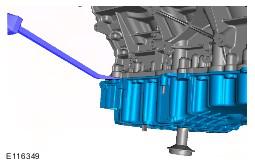
NOTE:
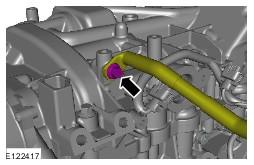
Make sure to use the aluminium lug provided on the oil pan extension to lever against.
NOTE:
Do not disassemble further if the component is removed for access only.